Stop Before You Mix: Understanding the Chemistry That Protects Your Family
Every year, households worldwide experience preventable accidents due to combining common cleaning products. What seems like a logical step to boost cleaning power can unleash toxic gases, cause chemical burns, or create hazardous reactions in enclosed spaces. This guide synthesizes critical safety information from the Centers for Disease Control and Prevention (CDC), the American Association of Poison Control Centers, and global chemical safety authorities to provide a complete, actionable reference. Whether tackling bathroom grime, kitchen grease, or seasonal deep-cleaning projects, understanding these interactions is essential for protecting your health, your family, and your home. Safety isn’t about fear—it’s about informed, confident action grounded in verified principles.
Introduction: The Hidden Risks Lurking Under Your Sink
Walk into any grocery store aisle, and you’ll find an overwhelming array of cleaning solutions promising shine, disinfection, freshness, and convenience. What packaging rarely emphasizes is this: the greatest danger often isn’t the product itself, but what happens when two seemingly innocent bottles meet. Public health data consistently identifies household cleaning substance exposures among the top categories of non-pharmaceutical poisonings reported annually across the United States, Canada, the UK, Australia, and the European Union. These patterns reflect a critical gap in everyday awareness about chemical incompatibility.
Documented incidents in medical literature describe scenarios where individuals attempting routine cleaning in enclosed spaces combined ammonia-based and bleach-based products without adequate rinsing or ventilation. The resulting release of irritant gases led to acute respiratory symptoms requiring medical evaluation. These cases are not isolated—they illustrate how easily hazardous reactions occur during ordinary tasks. Chemical reactions don’t require laboratory conditions. They occur instantly upon contact: in your spray bottle, on your countertop, inside drainpipes, or in the humid air of a steamy bathroom. Temperature, concentration, surface material, and ventilation all influence severity—but the trigger is always unintended contact between incompatible substances. This guide moves beyond simplistic warnings. We provide a systematic framework for understanding why certain combinations are hazardous, recognizing real-world scenarios where accidents occur, implementing fail-safe prevention strategies, and knowing precisely how to respond if exposure happens. Safety begins with knowledge, reinforced by consistent practice.
The SAFE Cleaning Framework: Your Four-Step System for Accident Prevention
Memorizing every dangerous combination is neither practical nor necessary. What matters is adopting a consistent, reliable system that prevents accidents before they occur. Developed by synthesizing protocols from occupational safety standards (adapted for residential contexts) and poison control best practices, the SAFE Cleaning Framework transforms safety from a reactive concern into a proactive habit. SAFE represents four interdependent pillars: Separate, Assess, Follow, Emergency Preparedness. Integrating these steps into every cleaning task creates a cognitive and physical safety net far more effective than relying on memory alone.
Step 1: Separate – The Golden Rule of Product Management
Separation operates on two critical levels: physical storage and sequential use. Physically, incompatible products must never share unsecured storage space. Chemically, no two products should contact the same surface without thorough rinsing and complete drying in between. This step addresses the most common accident pathway: convenience-driven mixing.
Why This Step Is Crucial:
Chemical reactions require contact. Preventing unintended contact is the foundation of accident prevention. Analysis of household cleaning incidents indicates that a significant proportion of severe exposures occur when individuals attempt to enhance cleaning efficacy by combining multiple products—often in the same container or on the same surface within minutes. Separation eliminates this pathway entirely. It also mitigates risks from accidental spills; if an acidic toilet cleaner tips onto a bleach container stored below, the resulting reaction could breach containers and release fumes before intervention.
How to Implement Separation Correctly:
Storage Separation:
– Designate distinct zones in your cleaning supply area using separate, labeled bins: one for chlorine-based products (bleach, mold removers), one for ammonia-containing products (glass cleaners, some floor polishes), one for acids (vinegar-based solutions, lime scale removers, toilet bowl cleaners), and one for oxidizers (hydrogen peroxide, oxygen bleach powder).
– Store heavy or corrosive containers (like drain openers) on lower shelves to prevent dangerous falls. Never store cleaning products above food, dishes, pet supplies, or medication.
– Utilize child-resistant locks on cabinets. Remember: these are child-resistant, not child-proof. True safety requires both physical barriers and ongoing education.
– For households with limited space (apartments, small homes), wall-mounted racks with clear compartmentalization or an over-the-door organizer with labeled pockets create vital separation.
Use Separation:
– Adopt the “one product per task” rule. If a surface requires multiple treatments (e.g., degreaser followed by disinfectant), complete the entire process for the first product: apply, dwell per label instructions, rinse thoroughly with clean water, dry completely, then introduce the second product.
– Dedicate specific tools: one sponge for bathroom disinfection (bleach-based), another for kitchen counters (all-purpose), a third for glass (ammonia-based). Color-code them with permanent marker or colored tape.
– Never “top off” a spray bottle. Residual liquid creates an immediate reaction hazard. When switching cleaners, wash the bottle thoroughly with soap and water, then rinse multiple times with clean water before refilling. Better yet: maintain dedicated, clearly labeled bottles for each solution.
Common Mistakes to Avoid:
– The “Quick Rinse” Fallacy: Splashing a surface with water after Product A and immediately applying Product B is insufficient. Microscopic residues remain, especially in grout lines, textured surfaces, or porous materials like wood or unsealed stone. True separation requires visible drying.
– Shared Containers: Pouring vinegar into a nearly empty hydrogen peroxide bottle “to save space” is exceptionally dangerous. Always use original containers or dedicated, labeled refill bottles.
– Ignoring Product Evolution: A cleaner labeled “ammonia-free” today might be reformulated tomorrow. Never assume compatibility based on past experience. Always verify current labels.
Budget-Friendly Separation Tip:
Repurpose clean, sturdy cardboard boxes from deliveries. Label each clearly: “BLEACH ZONE,” “ACID ZONE,” etc. Place boxes on different shelves. For tool separation, use inexpensive colored rubber bands wrapped around sponge handles or spray bottle triggers.
Step 2: Assess – Evaluate Task, Environment, and Tools Before Starting
Assessment is the cognitive checkpoint that prevents impulsive decisions. Before uncapping a single bottle, pause to evaluate four key elements: the surface material, the type of soil (dust, grease, mold), the ventilation of the space, and the presence of vulnerable individuals (children, pets, elderly, or those with respiratory conditions like asthma). This step counters the “more is better” mentality that drives dangerous mixing.
Why This Step Is Crucial:
Using an overly aggressive chemical for a light task increases unnecessary risk. Conversely, underestimating a task may tempt someone to combine products recklessly. Assessment aligns the solution precisely to the problem. Ventilation assessment is equally critical: a reaction producing low levels of fumes in a well-ventilated garage may pose minimal risk, but the exact same reaction in a windowless bathroom becomes hazardous within seconds. The CDC emphasizes that inadequate ventilation is a major contributing factor in the severity of chemical exposure incidents.
How to Conduct a Thorough Assessment:
Surface and Soil Analysis:
– Consult manufacturer guidelines for surfaces (e.g., “Do not use acidic cleaners on natural stone” for marble or granite). When unsure, test any cleaner on a small, inconspicuous area first.
– Match cleaner strength to soil type:
– Light soil (dust, fingerprints): Microfiber cloth with water or diluted all-purpose cleaner.
– Moderate soil (grease, soap scum): Dedicated degreaser or alkaline cleaner (for grease) / acidic cleaner (for soap scum/mineral deposits).
– Heavy soil (mold, ingrained grime): Targeted product (e.g., bleach-based mold remover used alone), potentially requiring mechanical action (scrubbing) rather than chemical escalation.
– Ask: “Is disinfection truly necessary here?” The EPA notes that routine cleaning (removing dirt) is sufficient for most household surfaces. Reserve disinfectants for high-touch areas (doorknobs, light switches) or after illness. Overusing disinfectants increases chemical exposure risk without added benefit.
Environmental Assessment:
– Ventilation Check: Open windows and doors before starting. Turn on exhaust fans (bathroom, kitchen range hood). If no mechanical ventilation exists, position a box fan in a window blowing outward to actively pull fumes from the space. If you cannot achieve adequate airflow, postpone the task.
– Vulnerability Check: Are children or pets able to enter the area? Secure the space. Do any household members have sensitivities? Choose fragrance-free, dye-free options where possible.
– Tool Check: Are your gloves intact? Is your sponge dedicated to this product type? Is your spray bottle clearly labeled? Address gaps before proceeding.
Real-World Assessment Scenario:
Task: Removing hard water stains from a chrome faucet.
Poor Assessment: “This is tough. I’ll mix vinegar (acid for mineral deposits) and bleach (for shine) to make a super-cleaner.” → DANGEROUS.
SAFE Assessment:
1. Surface: Chrome is generally acid-tolerant, but bleach can cause pitting over time.
2. Soil: Mineral deposits respond well to mild acids.
3. Environment: Small bathroom; open window, turn on exhaust fan.
4. Solution: Use undiluted white vinegar on a cloth, wrap around faucet for 15 minutes, scrub gently, rinse thoroughly. No bleach needed. If stains persist, repeat vinegar treatment or use a commercial lime scale remover alone, following label instructions.
This assessment prevents a hazardous mix while achieving the goal effectively.
Common Mistakes to Avoid:
– Assuming “Natural” Equals “Safe to Mix”: Vinegar is natural; hydrogen peroxide is natural. Mixed, they create corrosive peracetic acid. “Natural” describes origin, not chemical behavior.
– Ignoring Humidity: High humidity (common in bathrooms after showers) slows evaporation of fumes, increasing inhalation risk. Always clean after the room has cooled and dried, or significantly increase ventilation time.
– Task Creep: Starting to clean the sink, then noticing the mirror is streaky, and grabbing the ammonia-based glass cleaner without re-assessing the space (which now has residual sink cleaner fumes). Complete one task fully before moving to the next.
Step 3: Follow – Adhere Strictly to Manufacturer Instructions and Label Warnings
Labels are legally mandated safety documents developed through rigorous product testing. The “Precautionary Statements” section contains non-negotiable directives. Following labels is the single most effective way to avoid accidents, yet it’s frequently overlooked in the rush to clean.
Why This Step Is Crucial:
Manufacturers conduct compatibility testing specific to their formulations. A warning like “Do not mix with other chemicals” exists because testing confirmed dangerous reactions occur. Ignoring this voids any safety margin built into the product. Labels also provide critical usage parameters: correct dilution ratios (using full-strength bleach increases fume production unnecessarily), required dwell times for effectiveness (reducing the urge to “boost” with another product), and specific first-aid measures. Regulatory bodies worldwide enforce labeling requirements precisely because deviations cause documented harm.
How to Follow Labels Correctly:
Decode the Label:
– Signal Words: “DANGER” (severe hazard), “WARNING” (moderate hazard), “CAUTION” (minor hazard). Heed the level of urgency.
– Hazard Statements: “Causes severe skin burns,” “Toxic if inhaled,” “May form flammable vapor-air mixture.” These describe specific risks.
– Precautionary Statements: “Wear protective gloves/eye protection,” “Use only outdoors or in a well-ventilated area,” “Do not mix with ammonia or acids.” These are your action steps.
– First Aid Measures: “IF INHALED: Remove victim to fresh air,” “IF ON SKIN: Wash with plenty of soap and water.” Know these before an accident occurs.
– Pictograms: Globally harmonized symbols (flame, corrosion, skull) provide instant visual warnings. Learn them.
Practical Implementation:
– Read the entire label before purchasing. If warnings seem excessive for your needs, choose a milder alternative.
– Read the label again immediately before each use, especially if you haven’t used the product recently. Formulations change.
– Use measuring caps or cups provided—never “eyeball” amounts. Over-concentrating increases hazard without improving results.
– Respect dwell times. If a disinfectant requires 10 minutes of wet contact time, set a timer. Rushing leads to reapplication or adding another product prematurely.
– When labels conflict (e.g., Product A says “rinse thoroughly,” Product B says “do not rinse”), do not use them sequentially on the same surface. Choose one product.
Label Red Flags Requiring Immediate Caution:
– “Never mix with…” followed by specific products (ammonia, acids, other cleaners).
– “Harmful or fatal if swallowed” combined with “strong odor” (increases inhalation risk).
– “Corrosive” or “Causes burns” – demands glove and eye protection.
– “Vapors may cause drowsiness or dizziness” – requires exceptional ventilation.
Common Mistakes to Avoid:
– The “I’ve Done It Before” Trap: Past luck does not guarantee future safety. Variables change: product concentration, room temperature, your own health status. Consistency with labels is the only reliable path.
– Ignoring Small Print: Critical warnings are sometimes in smaller font below marketing claims. Train yourself to scan the entire label.
– Assuming All Brands Are Equal: A “toilet bowl cleaner” from Brand X may be hydrochloric acid-based, while Brand Y uses citric acid. Their compatibility with other products differs significantly. Always check your specific product’s label.
Emergency Tip Embedded in Labels:
Many labels include the phone number for the manufacturer’s emergency hotline or poison control. Take 10 seconds to save the national Poison Control number (1-800-222-1222 in the US and Canada; find your local equivalent) in your phone now. Having it accessible saves critical seconds during an emergency.
Step 4: Emergency Preparedness – Know Exactly What to Do When Things Go Wrong
Despite meticulous prevention, accidents can happen—a slip, a misread label, an unexpected reaction. Preparedness transforms panic into purposeful action, minimizing harm. This step is not about anticipating failure; it’s about respecting that chemicals demand respect, and having a plan is part of responsible safety practice.
Why This Step Is Crucial:
Seconds count in chemical exposures. Inhalation of toxic gases can cause airway swelling within minutes. Skin contact with corrosives causes progressive damage the longer it remains. Knowing precise, evidence-based steps ensures you act correctly under stress. Organizations like the American Red Cross emphasize that immediate, appropriate first aid significantly improves outcomes in chemical exposure incidents. Preparedness also includes prevention tools: having emergency equipment readily available reduces response time.
Building Your Home Emergency Kit:
– Essential Contact Numbers: Poison Control (save in phone AND post visibly near cleaning supplies), local emergency number (911/112/000), nearest emergency room address.
– First Aid Supplies: Large bottle of sterile saline solution or clean lukewarm water (for eye/skin flushing), mild soap, clean towels, nitrile gloves (for rescuer protection).
– Ventilation Tools: Box fan dedicated for emergencies (stored nearby), knowledge of how to open windows quickly.
– Product Information: Keep original product containers accessible. In an emergency, responders need to know exactly what was involved. Never discard the bottle after an exposure occurs.
Step-by-Step Emergency Protocols:
For Inhalation of Fumes (Coughing, Burning Eyes, Dizziness, Shortness of Breath):
1. EVACUATE IMMEDIATELY. Do not stop to open windows first. Get yourself and others to fresh air. Move upwind if outdoors.
2. CALL FOR HELP. Once in fresh air, call Poison Control or emergency services. State clearly: “Chemical inhalation exposure,” describe symptoms, and have the product container ready.
3. DO NOT INDUCE VOMITING or give anything by mouth unless instructed by medical professionals.
4. REST AND MONITOR. Sit quietly. Even if symptoms seem mild initially, some gases can cause delayed effects. Medical evaluation is essential.
5. VENTILATE THE AREA only after ensuring your own safety—use fans from outside the contaminated space if possible. Do not re-enter until professionals declare it safe.
For Skin or Eye Contact (Redness, Pain, Burning, Blistering):
1. FLUSH CONTINUOUSLY. For skin: Remove contaminated clothing carefully (cut away if necessary), rinse affected area under lukewarm running water for at least 15–20 minutes. For eyes: Hold eyelids open, roll eyes to ensure all surfaces are flushed. Use an eyewash station, shower, or gentle stream from a faucet. Time is tissue.
2. CALL POISON CONTROL while flushing if possible, or immediately after.
3. DO NOT APPLY creams, ointments, oils, or “neutralizing” agents. These can trap chemicals or cause additional reactions. Water is the universal first aid.
4. COVER LOOSELY with a clean, non-stick cloth after flushing. Seek medical attention promptly, especially for eye exposure or large skin areas.
For Ingestion (Swallowing):
1. DO NOT INDUCE VOMITING. Vomiting can cause further damage to the esophagus and airway.
2. RINSE MOUTH gently with water. Have the person spit out the water.
3. CALL POISON CONTROL IMMEDIATELY. Have the product container in hand. Provide exact details: product name, ingredients if listed, estimated amount swallowed, person’s age/weight, current symptoms.
4. FOLLOW INSTRUCTIONS PRECISELY. They may advise giving small sips of water or milk only if conscious and able to swallow, or direct transport to the ER. Never give anything by mouth unless directed.
5. TRANSPORT TO EMERGENCY ROOM if advised, taking the product container with you.
The Fundamental Principle: Safety is not the absence of risk—it is the presence of preparedness. Knowledge transforms anxiety into agency. Every second spent learning these protocols is an investment in your household’s resilience.
Common Mistakes to Avoid in Emergencies:
– Holding Breath and “Fixing” the Spill: Your safety comes first. Evacuate before attempting cleanup.
– Using Home Remedies: Milk for acid burns? Vinegar for alkali burns? These outdated practices are dangerous and delay proper care. Water flushing is the universal initial step.
– Downplaying Symptoms: “I feel a little dizzy, but it’s passing.” Some chemical effects are delayed. Always seek professional assessment after significant exposure.
– Forgetting Rescuer Safety: Never enter a contaminated area without ensuring your own airway is protected. You cannot help if you become a victim.
Budget Emergency Prep:
Designate a specific spot under the sink (away from cleaners!) for a large water bottle labeled “EMERGENCY FLUSH,” a roll of paper towels, and a printed card with Poison Control number and key steps. Update your phone contacts today. This costs nothing but provides immense security.
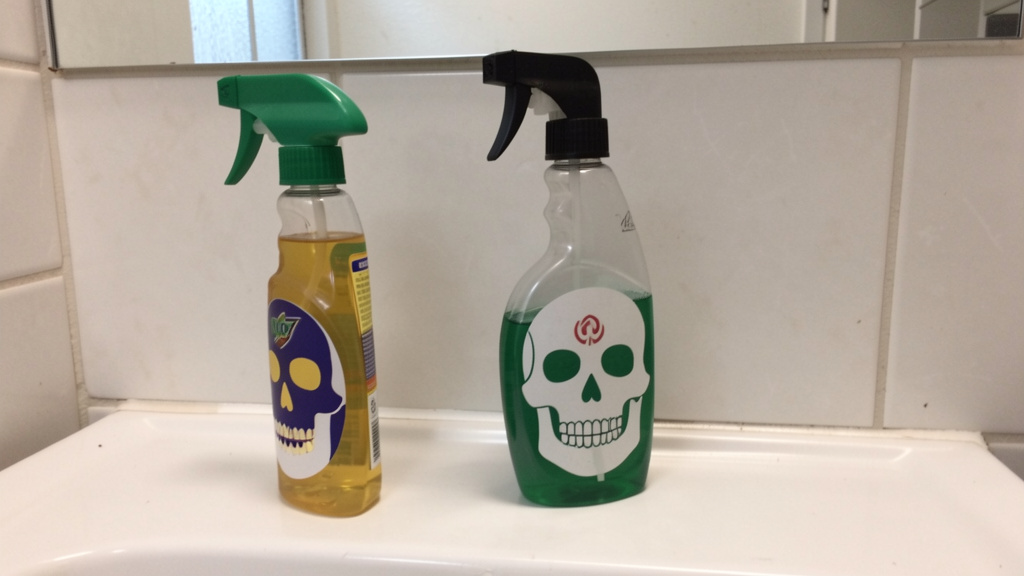
The Danger Zone: In-Depth Analysis of Hazardous Cleaning Product Combinations
Understanding the SAFE Framework provides your prevention system. Now, examine specific high-risk combinations with scientific clarity, real-world context, and actionable guidance. This section explains the chemistry, the scenarios where accidents occur, symptoms of exposure, immediate actions, and foolproof prevention. Knowledge of the “why” makes the “don’t” unforgettable.
Bleach (Sodium Hypochlorite) + Ammonia: The Chloramine Gas Hazard
The Chemistry Simplified:
Household bleach contains sodium hypochlorite (NaOCl). Ammonia (NH₃) is found in many glass cleaners, floor waxes, and urine (relevant for pet accident cleanup). When mixed, they produce chloramine gases (NH₂Cl, NHCl₂, NCl₃). Monochloramine irritates mucous membranes; dichloramine causes more severe respiratory distress; nitrogen trichloride is highly irritating and potentially explosive in concentrated forms. These gases are heavier than air, accumulating near the floor—posing heightened risk to children and pets.
Real-World Accident Scenarios:
– The Bathroom Blitz: Cleaning a toilet with a bleach-based disinfectant, then immediately using an ammonia-based glass cleaner on the mirror above without ventilating or waiting. Fumes concentrate in the small space.
– Pet Accident Response: Using an ammonia-based cleaner to neutralize urine odor on a carpet, then applying bleach to disinfect the same spot “to be thorough.” Urine itself contains urea, which breaks down into ammonia—making bleach application on fresh urine risky even without added ammonia cleaner.
– The “Stronger Disinfectant” Myth: Believing mixing bleach and ammonia creates a more potent germ-killer. It does not; it creates a respiratory hazard while neutralizing the disinfecting power of both.
Symptoms of Exposure:
Mild: Watery, burning eyes; runny nose; coughing; sore throat.
Moderate: Chest tightness; shortness of breath; nausea; headache.
Severe: Fluid in the lungs; difficulty breathing; wheezing; blue lips/fingernails; collapse. Symptoms can escalate rapidly in enclosed spaces.
Immediate Actions if Mixed:
1. Evacuate everyone (including pets) from the area immediately. Move to fresh air.
2. Call Poison Control (1-800-222-1222) or emergency services if breathing difficulties occur.
3. Open all windows and doors. Use fans to blow air outward from the contaminated room.
4. Do not re-enter until the area is fully ventilated (30+ minutes with strong airflow) and fumes are undetectable.
5. If skin/eyes contacted the mixture, flush with water for 15+ minutes. Seek medical evaluation.
Prevention Strategies:
– Absolute Rule: Never use bleach and ammonia-containing products in the same room on the same day.
– Check all product labels for “ammonia,” “ammonium hydroxide,” or “amine” compounds. Many all-purpose cleaners, stainless steel polishes, and oven cleaners contain ammonia derivatives.
– For pet accidents: Blot urine thoroughly. Clean with enzymatic cleaner (designed to break down organic matter) alone. Avoid bleach entirely on urine stains.
– If you must use both products in your home (e.g., bleach for laundry, ammonia-based glass cleaner), store them in separate, labeled bins in different locations.
– Critical Reminder: Urine contains ammonia. Never use bleach to clean up fresh pet or human urine. Use an enzymatic cleaner specifically formulated for biological stains.
Bleach + Acids (Vinegar, Toilet Bowl Cleaners, Lime Scale Removers): Chlorine Gas Release
The Chemistry Simplified:
Bleach (sodium hypochlorite, NaOCl) reacts with acids (compounds with low pH like acetic acid in vinegar, hydrochloric acid in toilet cleaners) to produce chlorine gas (Cl₂), a pungent, irritating gas. Chlorine gas reacts with moisture in the eyes, nose, throat, and lungs to form hydrochloric acid and hypochlorous acid—causing chemical burns to respiratory tissues.
Real-World Accident Scenarios:
– The “Natural Boost” Error: Adding white vinegar to a bleach solution “to cut through grease better.” This is dangerously counterproductive.
– Toilet Cleaning Cascade: Using a hydrochloric acid-based toilet bowl cleaner to remove limescale, flushing, then immediately adding bleach tablets to the tank or bowl. Residual acid reacts with bleach.
– Coffee Maker “Deep Clean”: Running a vinegar descaling cycle, then attempting to sanitize with a bleach solution without multiple thorough water rinses in between.
– DIY Drain Opener: Pouring vinegar down a drain followed by bleach to “unclog and disinfect.” This creates chlorine gas directly in the confined pipe space.
Symptoms of Exposure:
Mild: Immediate burning sensation in eyes/nose/throat; coughing; tearing; metallic taste.
Moderate: Chest pain; tightness; nausea; vomiting; headache; blurred vision.
Severe: Difficulty breathing; wheezing; frothy sputum; chest pain; loss of consciousness. Chlorine gas exposure can cause long-term respiratory damage.
Immediate Actions if Mixed:
1. EVACUATE IMMEDIATELY. Chlorine gas is intensely irritating—your instinct to flee is correct. Move upwind if outdoors.
2. CALL EMERGENCY SERVICES if breathing is difficult. Chlorine gas exposure requires urgent medical assessment.
3. VENTILATE AGGRESSIVELY from outside the contaminated area once safe to do so.
4. FLUSH SKIN/EYES with water for 15+ minutes if contacted. Remove contaminated clothing.
5. DO NOT attempt to “neutralize” the spill. Evacuation and ventilation are paramount.
Prevention Strategies:
– Absolute Rule: Never mix bleach with any acidic cleaner. Assume all toilet bowl cleaners, lime scale removers, rust removers, and “descaling” solutions are acidic unless the label explicitly states otherwise.
– Vinegar Caution: While vinegar is a useful cleaner alone, treat it as chemically incompatible with bleach. Never use vinegar-based cleaners in areas recently treated with bleach (wait 24+ hours with thorough rinsing).
– Toilet Cleaning Protocol: Choose either an acid-based cleaner or a bleach-based cleaner per cleaning session. If switching types:
1. Flush toilet multiple times.
2. Wipe bowl thoroughly with clean water and a dedicated cloth.
3. Allow to dry completely.
4. Wait at least 1–2 hours before applying the second product type.
Better yet: Stick to one system consistently. For routine cleaning, a non-bleach, non-acid all-purpose cleaner may suffice.
– Read Ingredient Lists: Look for “hydrochloric acid,” “muriatic acid,” “sulfamic acid,” “citric acid,” “phosphoric acid,” “acetic acid,” or “vinegar” on labels. If present, keep far from bleach.
Bleach + Rubbing Alcohol (Isopropyl Alcohol): Chloroform and Chloroacetone Formation
The Chemistry Simplified:
Mixing sodium hypochlorite (bleach) with isopropyl alcohol (C₃H₈O, found in rubbing alcohol, some glass cleaners, and electronics cleaners) triggers oxidation reactions. Primary hazardous products include chloroform (CHCl₃), a central nervous system depressant, and chloroacetone (C₃H₅ClO), a potent lachrymator (tear gas) causing severe eye irritation and respiratory distress. Hydrochloric acid may also form.
Real-World Accident Scenarios:
– Electronics Cleaning Mistake: Using rubbing alcohol to clean a keyboard, then wiping the surrounding desk surface with a bleach disinfectant wipe without allowing the alcohol to fully evaporate. Fumes mix in the air.
– DIY Disinfectant Spray: Combining bleach, water, and rubbing alcohol in a spray bottle “to make it evaporate faster.” This creates a hazardous aerosol.
– Laundry Additive Error: Adding rubbing alcohol to a wash cycle with bleach to “sanitize gym clothes.” Localized high concentrations can still form during agitation.
Symptoms of Exposure:
Chloroform Effects: Dizziness; headache; nausea; fatigue; confusion; loss of coordination.
Chloroacetone Effects: Immediate, intense eye watering and pain; burning sensation in nose/throat; coughing.
Combined: Symptoms can escalate rapidly in poorly ventilated spaces. The depressant effect of chloroform may mask irritating effects, leading individuals to remain in the hazardous environment longer.
Immediate Actions if Mixed:
1. Evacuate to fresh air immediately.
2. Call Poison Control. Describe the products mixed.
3. Ventilate the area thoroughly before re-entry.
4. If eye exposure occurs, flush continuously for 15+ minutes. Seek medical attention for persistent irritation.
5. Discard any contaminated clothing or materials that absorbed the mixture.
Prevention Strategies:
– Absolute Rule: Never use bleach and isopropyl alcohol-based products in the same space simultaneously. Allow ample time (several hours) and thorough ventilation between uses.
– Check All Product Labels: Rubbing alcohol isn’t just in medicine cabinets. It’s a solvent in many glass cleaners, stainless steel polishes, and specialty electronics cleaners. Look for “isopropyl alcohol,” “IPA,” or “2-propanol” in ingredients.
– Dedicated Spaces: Use alcohol-based cleaners for electronics in a well-ventilated area away from where bleach is stored or used.
– Safer Alternatives for Electronics: Use pre-moistened electronics cleaning wipes specifically designed for screens and components, or a microfiber cloth slightly dampened with distilled water.
Hydrogen Peroxide (≥3%) + Vinegar: Peracetic Acid Formation
The Chemistry Simplified:
Hydrogen peroxide (H₂O₂) and acetic acid (vinegar, CH₃COOH) react to form peracetic acid (CH₃COOOH), a powerful oxidizing agent. Even at low concentrations formed from mixing common cleaners, peracetic acid is highly corrosive to skin, eyes, and respiratory tissues. It can cause chemical burns on contact and severe irritation when inhaled. The reaction is accelerated by heat and light.
Real-World Accident Scenarios:
– The “Super Disinfectant” DIY Recipe: Following online instructions to mix equal parts hydrogen peroxide and vinegar in a single spray bottle “for a non-toxic, powerful disinfectant.” This is dangerously incorrect.
– Sequential Surface Cleaning: Spraying vinegar on a cutting board to deodorize, then immediately spraying hydrogen peroxide to disinfect, without rinsing or drying in between. Residues mix on the surface.
– Misguided Produce Wash: Combining hydrogen peroxide and vinegar in a bowl of water to “sanitize fruits and vegetables,” then consuming residues.
Symptoms of Exposure:
Skin Contact: Redness; pain; blistering; chemical burns.
Eye Contact: Severe pain; redness; tearing; potential corneal damage.
Inhalation: Coughing; sore throat; shortness of breath; chest tightness.
Ingestion: Nausea; vomiting; abdominal pain; potential internal burns.
Immediate Actions if Mixed:
1. STOP. Do not use the mixture.
2. VENTILATE the area immediately. Open windows, use fans.
3. DISCARD SAFELY: If mixed in a container, do not cap it tightly. Place container outside in a well-ventilated area away from people/pets. Dilute heavily with water before pouring down a drain with running water (check local regulations).
4. FLUSH any skin/eye contact immediately with lukewarm water for 15+ minutes. Remove contaminated clothing.
5. CALL POISON CONTROL for guidance, especially if ingestion is suspected or symptoms occur.
Prevention Strategies:
– Absolute Rule: Never combine hydrogen peroxide and vinegar in the same container or apply them sequentially to the same surface without thorough rinsing and drying.
– Safe Sequential Use Protocol (if absolutely necessary):
1. Apply first product (e.g., vinegar for deodorizing).
2. Rinse surface extensively with clean water.
3. Dry surface completely with a clean cloth.
4. Wait at least 15–30 minutes.
5. Apply second product (e.g., hydrogen peroxide for disinfection).
However, this is generally unnecessary. Choose one product for the task.
– Effective Single-Product Use:
– Hydrogen Peroxide (3%): Excellent disinfectant for non-porous surfaces (countertops, sinks). Spray, let dwell 5–10 minutes, wipe. Breaks down into water and oxygen.
– Vinegar: Effective deodorizer and for dissolving mineral deposits. Not a reliable disinfectant against most pathogens (per EPA guidelines). Use alone for its intended purposes.
– Beware of “Two-Step” DIY Advice: Many blogs suggest spraying vinegar then hydrogen peroxide on the same surface “without mixing in the bottle.” Residues can still mix on the surface, especially in crevices. The risk outweighs any perceived benefit. Stick to one product.
Critical Clarification on Food Safety:
The FDA and USDA do not recommend using hydrogen peroxide or vinegar mixtures for produce washing. Plain running water is sufficient for most fruits and vegetables. For firm produce (apples, cucumbers), scrubbing with a clean brush under water is effective.
Mixing Different Drain Cleaners: Heat, Pressure, and Explosion Risk
The Chemistry Simplified:
Drain cleaners fall into two primary chemical categories:
– Alkaline (Caustic) Cleaners: Contain sodium hydroxide (lye) or potassium hydroxide. They dissolve organic matter (hair, grease) through saponification. Highly corrosive.
– Acidic Cleaners: Contain sulfuric acid, hydrochloric acid, or sulfamic acid. They dissolve mineral deposits (limescale, rust). Also highly corrosive.
Mixing an alkaline cleaner with an acidic cleaner causes a violent neutralization reaction. This reaction is highly exothermic—releasing intense heat rapidly. In a confined space like a drainpipe, this heat can:
1. Melt or warp plastic pipes.
2. Cause the liquid to boil violently, ejecting hot, corrosive chemicals.
3. Generate significant gas pressure, potentially rupturing the container or pipe joints.
Even mixing two cleaners of the same type can cause unpredictable reactions due to differing additives.
Real-World Accident Scenarios:
– The “Stubborn Clog” Cascade: Pouring Brand A drain opener (alkaline) down a sink, waiting 15 minutes with no result, then immediately pouring Brand B drain opener (acidic) “to try something stronger” without flushing the pipe.
– Product Confusion: Using a toilet bowl cleaner (acidic) to attempt unclogging a toilet, then adding a general-purpose drain opener (often alkaline).
– Leftover Residue: Using a drain cleaner in a shower drain, then days later using a different type in the adjacent bathroom sink drain connected to the same pipe system.
Symptoms of Exposure (from eruption):
Skin/Eye Contact: Immediate, severe chemical burns; intense pain; blistering; potential permanent scarring or vision loss.
Inhalation: Coughing; choking; burning in airways; potential airway swelling.
Thermal Burns: From hot liquid or steam ejected during the reaction.
Immediate Actions if Mixed (or if eruption occurs):
1. EVACUATE the area immediately. Move away from the drain.
2. DO NOT LOOK DIRECTLY into the drain.
3. CALL EMERGENCY SERVICES if chemicals contact skin/eyes or if significant fumes are released.
4. IF SKIN/EYES CONTACTED: Flush immediately with lukewarm water for at least 20 minutes. Remove contaminated clothing carefully. Seek emergency medical care—chemical burns require professional treatment.
5. VENTILATE the area thoroughly once safe to do so.
6. DO NOT attempt further chemical intervention. Call a licensed plumber.
Prevention Strategies:
– Absolute Rule: Never use more than one type of chemical drain cleaner on a clog. Never mix brands or types.
– Mechanical Methods First: For most household clogs, mechanical solutions are safer and more effective:
– Plunger: Create a tight seal and use firm, steady plunges.
– Drain Snake/Auger: A hand-cranked auger ($10–$20 at hardware stores) can reach and retrieve hair clogs 15–25 feet into the pipe.
– Zip-It Tool: A cheap, disposable plastic tool with barbs to pull hair from sink/shower drains.
– If Using Chemical Cleaners:
1. Read the label completely. Confirm it’s suitable for your pipe type (PVC, metal) and the clog type.
2. Use only the recommended amount.
3. Set a timer. Do not exceed dwell time.
4. After use, flush copiously with cold water.
5. If the clog persists after one application and thorough flushing, stop. Call a plumber.
– Prevention is Best: Use drain strainers in all sinks, showers, and tubs. Pour boiling water down drains weekly (if pipes are metal; avoid on PVC). For maintenance, use enzymatic drain cleaners monthly—they use bacteria to digest organic matter slowly and safely.
Bleach + Hydrogen Peroxide: Oxygen Gas and Potential Container Rupture
The Chemistry Simplified:
Sodium hypochlorite (bleach) catalyzes the rapid decomposition of hydrogen peroxide (H₂O₂) into water (H₂O) and oxygen gas (O₂). While oxygen itself isn’t toxic, this reaction happens violently fast when concentrated solutions mix. The sudden release of oxygen gas creates extreme pressure. In a sealed container, this pressure can cause rupture, explosion, or ejection of contents—propelling fragments and spraying corrosive chemicals.
Real-World Accident Scenarios:
– DIY “Oxygen Bleach” Confusion: Mistaking hydrogen peroxide for “oxygen bleach” (which is sodium percarbonate—a stable powder). Mixing liquid hydrogen peroxide directly with chlorine bleach.
– Spray Bottle Contamination: Using a spray bottle for hydrogen peroxide disinfection, then later refilling it with diluted bleach without thorough cleaning.
– Laundry Experimentation: Adding both hydrogen peroxide and chlorine bleach to the same wash cycle “for extra whitening power.”
Symptoms of Exposure:
Primarily from the physical trauma of container rupture: cuts from flying debris, chemical splashes to skin/eyes causing burns. Inhalation risk from aerosolized chemicals.
Immediate Actions if Mixed:
1. IF IN A CONTAINER: Do not shake. Do not open. Place the container carefully outside in an open area away from people, pets, and ignition sources. Allow it to vent slowly. Do not handle further.
2. IF ERUPTION OCCURS: Evacuate area. Flush any skin/eye contact with water for 15+ minutes. Seek medical attention for cuts or chemical exposure.
3. VENTILATE the area to disperse any aerosolized chemicals.
Prevention Strategies:
– Absolute Rule: Never combine chlorine bleach and hydrogen peroxide in any container or application.
– Understand “Oxygen Bleach”: True oxygen bleach is a powder (sodium percarbonate). It is generally safe to use instead of chlorine bleach for colors and many surfaces, but do not mix the powder with liquid chlorine bleach. Use one or the other per load.
– Dedicated Tools: Maintain separate, clearly labeled spray bottles and measuring cups for bleach solutions and hydrogen peroxide solutions. Color-code with tape.
– Laundry Safety: Use chlorine bleach only on white cottons/linens as directed. Use hydrogen peroxide (added to the bleach dispenser or directly to the drum before clothes) only on colors where safe (test first). Never use both in the same load.
Other Critical Combinations to Avoid
Ammonia + Iodine (e.g., Betadine): Nitrogen Triiodide Risk
Chemistry: Ammonia reacts with iodine (found in some antiseptics like Betadine) to form nitrogen triiodide (NI₃), an extremely unstable compound that detonates violently when dry.
Scenario: Using iodine-based antiseptic on a cut, then cleaning the nearby counter with ammonia-based cleaner; residues mix.
Prevention: Store medical supplies (antiseptics) completely separate from cleaning supplies. Never use cleaning ammonia near medical iodine products. Clean surfaces contaminated with iodine using soap and water only.
Oven Cleaners + Other Cleaners: Caustic Residue Reactions
Chemistry: Most heavy-duty oven cleaners contain sodium hydroxide (lye), a strong alkali. Residue left on oven surfaces can react violently with acidic cleaners (vinegar, citric acid) used later, generating heat and splattering caustic material.
Scenario: Applying oven cleaner gel, waiting the dwell time, wiping away the bulk, but missing residue in crevices. Days later, using a vinegar solution to wipe the cooled oven interior.
Prevention: After using oven cleaner, follow label instructions exactly for rinsing. Typically, this involves multiple wipes with clean, damp cloths until no residue remains. For routine maintenance, use baking soda paste (non-caustic) instead of heavy-duty cleaners.
Essential Oils + Bleach or Ammonia: Unpredictable Reactions
Chemistry: Many essential oils (especially citrus oils like lemon, lime, orange) contain limonene and other terpenes. These can react with bleach to form hazardous compounds like chloroform and other irritating organic chlorides.
Scenario: Adding lemon essential oil to a bleach solution “for a fresh scent,” or using an essential oil diffuser in a room while cleaning with ammonia-based products.
Prevention: Never add essential oils to chemical cleaners. If desiring fragrance, choose cleaners with manufacturer-added fragrances (tested for stability) or use essential oils only in well-ventilated areas after cleaning is complete and surfaces are dry.
Beyond the Mix: Foundational Safety Practices for Every Household
Preventing dangerous combinations is paramount, but comprehensive safety requires attention to storage, ventilation, personal protection, and product selection. These practices form the bedrock of a low-risk cleaning environment.
Safe Storage: Organizing for Safety, Not Just Convenience
Proper storage prevents accidents before the cap is even opened. It protects children, pets, and adults from spills, misidentification, and unintended reactions.
The Zone System for Under-Sink Storage:
Divide your cleaning supply area into clearly defined, physically separated zones:
– Zone 1: Chlorine-Based Products (Bleach, mold/mildew removers, toilet cleaners with bleach). Store upright in original containers. Place on a stable shelf, preferably low to avoid falls. Use a secondary plastic tub to contain leaks.
– Zone 2: Ammonia & Amine-Based Products (Glass cleaners, some floor polishes, stainless steel cleaners). Store separately from Zone 1—ideally on a different shelf or in a different cabinet.
– Zone 3: Acidic Products (Vinegar solutions, lime scale removers, toilet bowl cleaners without bleach, rust removers). Store away from Zones 1 and 2.
– Zone 4: Oxidizers & Others (Hydrogen peroxide, oxygen bleach powder, all-purpose cleaners). Store hydrogen peroxide in a cool, dark place (light degrades it); keep separate from acids and chlorine products.
– Zone 5: Mechanical Tools & PPE (Gloves, sponges, brushes, microfiber cloths). Store away from chemical zones to prevent contamination.
Critical Storage Rules:
– Original Containers Only: Never transfer cleaners to food/drink containers (water bottles, juice jugs). This is a leading cause of childhood poisoning.
– Child Safety: Use cabinet locks rated for chemical storage. Store the most hazardous products (drain openers, oven cleaners) on high shelves behind locked doors.
– Temperature Control: Store away from heat sources (water heaters, furnaces), direct sunlight, and freezing temperatures. Heat accelerates chemical degradation; freezing can alter formulations.
– Spill Containment: Place products inside plastic tubs or trays. A small leak won’t pool on the cabinet floor.
– Regular Audits: Every 6 months, check expiration dates, container integrity (cracks, leaks, swollen bottles), and label legibility. Safely dispose of outdated or damaged products via household hazardous waste programs.
– Garage/Utility Room Storage: If storing in a garage, ensure containers are sealed tightly. Keep away from ignition sources. Use a locked, ventilated cabinet if possible.
Small Space Solution:
Apartment dwellers can use a dedicated, latched plastic tote stored on a high closet shelf. Label the tote clearly: “CLEANING SUPPLIES – HAZARDOUS.” Inside, use smaller bins or ziplock bags to separate zones. This portable system keeps products contained and away from living areas.
Ventilation: Your Invisible Shield Against Fumes
Ventilation dilutes and removes airborne chemicals before they reach hazardous concentrations. It’s non-negotiable for any cleaning task involving sprays, aerosols, or strong odors.
Ventilation Hierarchy of Controls:
1. Source Control (Best): Use low-VOC, fragrance-free products that generate fewer fumes.
2. Natural Ventilation: Open multiple windows and doors to create cross-breeze before starting.
3. Mechanical Ventilation (Essential for bathrooms/kitchens): Turn on exhaust fans at least 10 minutes before cleaning and keep running for 20–30 minutes after. Ensure fans vent outside.
4. Supplemental Ventilation: Place a box fan in a window blowing outward to actively pull contaminated air from the room.
5. Air Purifiers (Limited Role): HEPA filters capture particles but do not remove gases/vapors. Activated carbon filters can adsorb some VOCs, but they are not a substitute for source removal via ventilation.
Assessing Adequacy:
– The Smell Test: If you can strongly smell the cleaner after 5 minutes of active ventilation, it’s insufficient. Increase airflow.
– Physical Sensation: Burning eyes, throat tickle, or headache are warning signs of inadequate ventilation—stop immediately and improve airflow.
– Room Size Matters: Small, windowless bathrooms require maximum ventilation effort. Consider postponing strong-cleaner tasks for times when you can open a nearby window or door to an adjacent room with better airflow.
Ventilation Myths Debunked:
– “Opening one window is enough.” False. Cross-ventilation (air entering one window, exiting another) is vastly more effective.
– “The fan is on, so I’m safe.” Exhaust fans vary in power. Older or undersized fans may not move enough air. Supplement with open windows.
– “I don’t smell anything, so no fumes.” Absence of smell usually indicates low concentration, but don’t rely solely on this. Prioritize proactive ventilation.
Personal Protective Equipment (PPE): Simple Gear for Significant Protection
PPE is your last line of defense—but a critical one. For most household cleaning, minimal, accessible gear provides substantial protection.
Essential PPE Checklist:
– Gloves: Nitrile gloves (blue or purple) offer superior chemical resistance compared to latex or vinyl. They protect against skin irritation, absorption, and accidental contact with residues. Critical for: Bleach, drain cleaners, oven cleaners, acidic cleaners. Replace if torn, punctured, or after heavy use.
– Eye Protection: Safety glasses with side shields prevent splashes from reaching eyes. Critical for: Pouring concentrated cleaners, using drain/oven cleaners, spraying overhead surfaces. Inexpensive polycarbonate glasses are widely available.
– Respiratory Protection: For routine cleaning with proper ventilation, usually unnecessary. For individuals with asthma, chemical sensitivities, or when using strong products in less-than-ideal ventilation: an N95 respirator filters particles but not gases. For fume protection, a half-face respirator with organic vapor cartridges is required—but this is generally overkill for homes. Better solution: Improve ventilation or choose less volatile products.
– Clothing: Wear long sleeves and closed-toe shoes. Avoid loose clothing that could dip into cleaners. An old apron provides extra protection.
PPE Selection Guide by Task:
| Cleaning Task | Minimum PPE | Why |
|—————|————-|—–|
| Wiping counters with all-purpose cleaner | Nitrile gloves | Prevents skin dryness/irritation from surfactants |
| Using bleach disinfectant (diluted) | Nitrile gloves, safety glasses | Splashes can cause eye injury; gloves prevent skin irritation |
| Applying oven cleaner | Nitrile gloves (heavy-duty), safety glasses, long sleeves | Highly caustic; prolonged skin contact causes severe burns |
| Unclogging drain with chemical opener | Nitrile gloves (heavy-duty), safety glasses, face shield if available | High risk of eruption/splatter |
| Using vinegar/lime scale remover | Nitrile gloves | Acids can irritate skin with prolonged contact |
PPE Maintenance:
– Rinse gloves with soap and water after use; air dry. Store flat to prevent cracking.
– Wipe safety glasses with lens cleaner; store in a case.
– Never reuse disposable gloves. Discard torn or contaminated gloves immediately.
– Teach children that PPE is for adults during specific tasks—not toys.
Smart Product Selection: Choosing Safer Options Without Sacrificing Results
Your safest cleaning product is the one you don’t need. Strategic selection reduces hazard potential at the source.
Decoding Labels for Safety:
– EPA Safer Choice Label: Products bearing this label have been rigorously evaluated by the U.S. Environmental Protection Agency. Ingredients are screened for human health and environmental safety while maintaining effectiveness. Look for the logo.
– Green Seal or Ecologo Certification: Independent certifications verifying reduced environmental impact and restricted hazardous ingredients.
– “Free & Clear” Claims: Indicates absence of dyes and fragrances—critical for reducing respiratory irritants and allergic reactions.
– Avoid Vague Marketing: “Natural,” “Eco,” “Green” are unregulated terms. Always check the ingredient list and safety data.
When Disinfection Is Truly Necessary:
The CDC clarifies that disinfection (killing germs) is distinct from cleaning (removing dirt). Disinfect high-touch surfaces (doorknobs, light switches, remotes) when someone is sick, or in kitchens/bathrooms routinely. For most surfaces, cleaning with soap/detergent and water is sufficient.
– For Disinfection: Choose an EPA-registered disinfectant. Follow label instructions exactly for dwell time. Hydrogen peroxide (3%) or diluted bleach (if compatible with surface) are effective options used alone.
– Avoid “Antibacterial” Soaps: For handwashing, plain soap and water is equally effective and avoids contributing to antibiotic resistance concerns noted by regulatory agencies.
Single-Ingredient Powerhouses (Used Alone):
– White Vinegar (5% acetic acid): Deodorizes, dissolves light mineral deposits, cuts grease. Not a disinfectant. Safe on glass, chrome, sealed countertops. Avoid on natural stone, waxed wood, or cast iron.
– Baking Soda (Sodium Bicarbonate): Mild abrasive for scrubbing sinks/tubs; deodorizes carpets/fridges. Mix with water to form paste. Non-toxic.
– Castile Soap (Plant-based): Versatile cleaner for floors, walls, surfaces. Dilute per instructions. Biodegradable.
– Hydrogen Peroxide (3%): Effective disinfectant for non-porous surfaces. Spray, dwell 5–10 minutes, wipe. Breaks down to water/oxygen. Test on fabrics first.
– Rubbing Alcohol (70% Isopropyl): Disinfects electronics, thermometers, small tools. Evaporates quickly. Use in well-ventilated area; keep away from flames.
The Power of Mechanical Action:
Often overlooked, physical methods reduce chemical reliance:
– Microfiber cloths trap dirt and bacteria with just water.
– Scrub brushes with stiff bristles tackle grime without harsh chemicals.
– Steam cleaners use high-temperature vapor to sanitize surfaces (check surface compatibility first).
– Squeegees prevent water spots on glass/showers, reducing need for chemical cleaners.
Emergency Response Deep Dive: Protocols for Every Exposure Type
Despite prevention, knowing precise emergency steps is vital. This section provides expanded, step-by-step guidance aligned with American Red Cross and poison control protocols. Print this section and keep it near your cleaning supplies.
Inhalation Exposure: Step-by-Step Response
- Recognize Symptoms Early: Burning eyes/nose/throat, coughing, shortness of breath, headache, dizziness, nausea. Do not ignore mild symptoms.
- Immediate Evacuation:
- Move yourself and others upwind and to higher ground if outdoors (some fumes are heavier than air).
- If assisting someone else, ensure your own safety first. Do not become a second victim.
- Fresh Air Positioning:
- Sit or lie in fresh air. Loosen tight clothing.
- If breathing is difficult, sit upright (do not lie flat).
- If unconscious but breathing, place in recovery position (on side).
- Seek Help:
- Call Poison Control (1-800-222-1222) immediately, even if symptoms seem mild. Have product container ready.
- Call emergency services (911) if: breathing is labored/wheezing, lips/fingernails turn blue, confusion occurs, or symptoms worsen.
- Do NOT:
- Induce vomiting.
- Give anything by mouth unless instructed by professionals.
- Re-enter the contaminated area until declared safe.
- Medical Follow-Up:
- Even if symptoms resolve quickly, seek medical evaluation. Some gases can cause delayed pulmonary complications hours later. Inform medical staff of the specific chemical exposure.
Skin or Eye Contact: Step-by-Step Response
For Skin Contact:
1. Remove Contaminated Clothing: Cut away clothing if necessary to avoid spreading chemical or pulling over head. Wear gloves if available.
2. Flush Immediately:
– Hold affected area under lukewarm (not hot or cold) running water for at least 15–20 minutes.
– Use shower, faucet, or hose. Remove jewelry/watchbands under stream.
– For powdered chemicals, brush off gently first before flushing.
3. Do NOT:
– Use neutralizing chemicals.
– Apply ointments, butter, oils, or home remedies.
– Rub the area vigorously.
4. After Flushing:
– Gently pat dry with clean cloth.
– Cover loosely with sterile gauze or clean non-stick cloth.
– Call Poison Control. Seek medical attention for: large areas, face/genitals, blistering, persistent pain, or if chemical was drain/oven cleaner.
For Eye Contact (Medical Emergency):
1. Immediate Flushing is Critical:
– Hold eyelids open. Roll eyes to ensure all surfaces are flushed.
– Use lukewarm water from faucet, shower, or sterile saline.
– Flush continuously for at least 20 minutes. Time it.
– If wearing contact lenses, flush over them initially; they may be removed during flushing if easy.
2. Positioning:
– Tilt head so contaminated eye is down and away from unaffected eye.
– Have someone assist if possible.
3. Do NOT:
– Rub the eye.
– Apply any drops or ointments.
– Delay flushing—water is always available and correct.
4. After Flushing:
– Cover both eyes loosely with clean cloth (reduces eye movement).
– Seek emergency medical care immediately, even if pain subsides. Corneal damage may not be immediately apparent. Bring the product container.
Ingestion Exposure: Step-by-Step Response
- Do NOT Induce Vomiting. Vomiting can cause further damage to the esophagus and airway, especially with corrosives.
- Rinse Mouth:
- Have the person spit out any remaining substance.
- Gently rinse mouth with water or wipe with damp cloth. Do not swallow rinse water.
- Call Poison Control Immediately:
- Have the product container in hand.
- Provide: product name, ingredients (if listed), estimated amount swallowed, person’s age/weight, current symptoms.
- Follow their instructions exactly.
- If Unconscious, Having Seizures, or Difficulty Breathing:
- Call emergency services (911) immediately.
- Begin CPR if trained and person is not breathing.
- Do not give anything by mouth.
- Transport to Hospital:
- Take the product container or label with you.
- Do not drive if the affected person requires constant monitoring—call ambulance.
When to Seek Immediate Medical Attention (Summary)
Seek emergency care immediately for any exposure involving:
– Difficulty breathing, wheezing, or chest tightness
– Burns to skin or eyes (redness, pain, blistering)
– Confusion, drowsiness, or loss of consciousness
– Seizures
– Swallowing any amount of drain cleaner, oven cleaner, or concentrated acid/alkali
– Symptoms worsening after initial first aid
– Exposure involving a child, infant, pregnant person, or individual with pre-existing respiratory/cardiac conditions
Critical Reminder: Poison Control (1-800-222-1222) is staffed 24/7 by toxicology experts. They provide free, confidential, life-saving guidance. Call them at the first sign of concern—they are your best resource. Do not wait for symptoms to worsen.
Your Questions, Answered
Q: Is it ever safe to mix bleach and baking soda?
A: While mixing bleach and baking soda (sodium bicarbonate) does not produce toxic gases like chlorine or chloramine, it is unnecessary and counterproductive. Baking soda is alkaline, and adding it to bleach can reduce the bleach’s effectiveness as a disinfectant and cause the solution to degrade faster. For deodorizing and mild scrubbing, use baking soda paste alone. For disinfection, use properly diluted bleach alone. There is no cleaning benefit to combining them, so separation remains the safest practice.
Q: I accidentally mixed two cleaners and feel a little dizzy. Should I go to the hospital?
A: Yes, seek medical evaluation. Dizziness is a symptom of chemical inhalation exposure. Even if it seems mild initially, some gases can cause delayed, serious complications hours later. Immediately move to fresh air, call Poison Control (1-800-222-1222) for guidance, and do not ignore the symptom. When in doubt, err on the side of caution—medical professionals would rather evaluate a mild case than treat a severe one that was delayed.
Q: Are “green” or “eco-friendly” cleaning products always safe to mix with each other?
A: Absolutely not. “Green” refers to environmental impact or ingredient sourcing, not chemical compatibility. Vinegar (acidic) and hydrogen peroxide (an oxidizer) are both natural ingredients commonly found in eco-brands, but mixing them creates corrosive peracetic acid. Similarly, citric acid-based cleaners and sodium percarbonate (“oxygen bleach”) can react vigorously. Always treat any two cleaning products as potentially incompatible unless the manufacturer explicitly states they are safe to use together—and even then, verify with a reliable source like Poison Control. When using eco-products, follow the same SAFE Framework rules: Separate, Assess, Follow labels, Prepare for emergencies.
Q: How long should I wait between using an acidic cleaner and bleach on the same surface?
A: The only truly safe approach is to avoid sequential use of acidic cleaners and bleach on the same surface altogether. If absolutely necessary in specialized contexts, the protocol is rigorous: rinse thoroughly with clean water multiple times, wipe dry, allow the surface to air-dry completely, and wait a minimum of 1–2 hours before applying bleach. However, for virtually all household scenarios, this is unnecessary. Choose one product system: use an acid-based cleaner for mineral deposits or a bleach-based cleaner for disinfection/mold—not both on the same task. For routine cleaning, a quality all-purpose cleaner often suffices.
Q: Can I use bleach in my washing machine with color-safe bleach or oxygen bleach?
A: No. “Color-safe bleach” typically contains hydrogen peroxide or sodium percarbonate. Mixing chlorine bleach with hydrogen peroxide creates oxygen gas rapidly, which can cause pressure buildup and potentially damage your washing machine. Oxygen bleach (sodium percarbonate powder) breaks down into hydrogen peroxide and soda ash in water—mixing with chlorine bleach causes the same hazardous reaction. Rule: Use either chlorine bleach or oxygen/color-safe bleach per load, never both. For whites, use chlorine bleach as directed. For colors, use oxygen bleach or no bleach at all. Always add bleach to the dispenser designated for it.
Q: What are the specific signs of chlorine gas exposure versus ammonia exposure?
A: While both cause respiratory irritation, key differences exist:
– Chlorine Gas (from bleach + acid): Pungent, “swimming pool” odor. Immediate burning in eyes, nose, throat; coughing; tightness in chest; watery eyes; metallic taste.
– Ammonia/Chloramine Gas (from bleach + ammonia): Pungent, “urine-like” or sharp chemical odor. Similar eye/nose/throat irritation, but may cause more pronounced coughing, shortness of breath, and nausea.
Critical Note: Do not rely on odor to identify the gas or assess danger. Both are hazardous. Evacuate immediately at the first sign of irritation, regardless of the specific smell. Call Poison Control with product details for precise guidance.
Q: Is it safe to store cleaning products in the garage? What precautions are needed?
A: Storing cleaning products in a garage is acceptable if specific precautions are followed:
– Use a locked, well-ventilated cabinet made of chemical-resistant material.
– Store containers upright in secondary containment tubs to catch leaks.
– Keep away from ignition sources (water heater pilot lights, car engines).
– Ensure the garage is not attached directly to living spaces without a sealed door (fumes can migrate).
– Avoid extreme temperatures: heat accelerates chemical degradation; freezing can alter formulations.
– Never store gasoline, propane, or other flammables in the same cabinet as cleaners.
If your garage lacks these conditions, a locked cabinet inside the house (e.g., utility closet) with stable temperature is safer. Prioritize accessibility for emergency response over convenience.
Q: My child drank a small sip of an all-purpose cleaner. What do I do?
A: Act immediately but calmly:
1. Do NOT induce vomiting.
2. Rinse mouth gently with water; have child spit it out.
3. Call Poison Control (1-800-222-1222) immediately. Have the product container ready. Provide exact details: product name, ingredients if listed, estimated amount swallowed, child’s age/weight, current symptoms.
4. Follow their instructions precisely. They may advise giving small sips of water or milk, or going directly to the ER.
5. Do not give charcoal, milk, or other home remedies unless instructed.
Quick contact with Poison Control is the single most important step. Most exposures to diluted all-purpose cleaners result in minor irritation with proper guidance, but professional assessment is essential. Keep the number saved in your phone and posted visibly.
Q: Can I add essential oils to my DIY vinegar cleaner for fragrance?
A: Adding essential oils to vinegar-based cleaners is generally chemically safe (no hazardous reaction occurs between vinegar and most essential oils). However, significant caveats apply:
– Essential oils are potent allergens and respiratory irritants for some individuals, especially children, pets, and those with asthma.
– Oils can leave oily residues on surfaces, attracting more dust.
– Citrus oils (lemon, orange) are phototoxic and can damage surfaces exposed to sunlight.
– Critical Warning: Never add essential oils to bleach or ammonia-based cleaners. Citrus oils contain limonene, which can react with bleach to form hazardous compounds.
If you desire fragrance, choose a commercially prepared cleaner with manufacturer-tested fragrances, or use essential oils only in diffusers after cleaning is complete and the area is well-ventilated. For most cleaning tasks, fragrance is unnecessary—focus on effectiveness and safety.
Q: How do I safely dispose of old or unused cleaning products?
A: Never pour cleaners down drains, toilets, or storm sewers, and never throw full containers in regular trash. Follow these steps:
1. Use It Up: Safely use the product for its intended purpose following label instructions.
2. Donate: If unopened and usable, donate to community centers, shelters, or schools (call first to confirm need).
3. Household Hazardous Waste (HHW) Program: This is the primary safe disposal method. Most municipalities host periodic HHW collection events or have permanent facilities. Search “[Your City] household hazardous waste disposal” online for locations, dates, and accepted items.
4. Retailer Take-Back: Some hardware stores or pharmacies accept certain products (e.g., batteries, paint) for recycling. Call ahead to inquire about cleaning product disposal options.
5. Dilution and Disposal (Last Resort for Non-Hazardous): For very mild, non-toxic cleaners (like diluted vinegar or baking soda solutions), flushing with copious water may be acceptable per local regulations. However, for any product labeled as hazardous, corrosive, flammable, or toxic, always use HHW programs. When in doubt, contact your local waste management authority.
Conclusion and Next Step
Safety in cleaning isn’t about memorizing endless chemical formulas or living in fear of your supply closet. It’s about adopting a simple, consistent system that becomes second nature. The SAFE Framework—Separate, Assess, Follow, Emergency Preparedness—provides that system. By integrating these four pillars into your routine, you transform cleaning from a potential hazard into a confident, controlled activity.
Recap: The 3 Key Takeaways
1. Separation is non-negotiable: Store incompatible products apart and never apply multiple chemicals to the same surface without thorough rinsing and drying.
2. Assessment prevents impulse decisions: Pause before cleaning to evaluate the surface, soil, environment, and vulnerabilities. Match the solution precisely to the problem.
3. Labels are your roadmap: Read and follow every instruction and warning. They exist because testing confirmed specific risks.
The 24-Hour Rule: Within the next 24 hours, take one concrete action:
– Reorganize your under-sink storage using the Zone System.
– Save Poison Control (1-800-222-1222) in your phone and post it visibly near cleaning supplies.
– Discard one expired or damaged cleaning product safely via your local HHW program.
This tiny step creates immediate, lasting impact.
The Big Picture: Cleaning safety connects to broader household resilience. When you handle chemicals responsibly, you protect not only your family’s immediate health but also your home’s infrastructure (pipes, surfaces), the local environment (through proper disposal), and community resources (reducing preventable emergency calls). Every mindful choice ripples outward. You’ve now equipped yourself with knowledge grounded in science and safety protocols. Carry this awareness forward—not as a burden, but as empowerment. Clean with confidence, clean with care.
Explore Our Complete System:
Understanding Household Chemical Safety | Ventilation Best Practices for Every Room | Seasonal Deep Cleaning Without Risk | Childproofing Your Home Beyond the Basics | Sustainable Cleaning: Effective and Eco-Conscious Methods | First Aid for Common Home Accidents | Building Your Home Emergency Preparedness Kit