Move beyond Pinterest-perfect photos. Discover a step-by-step system to design an entryway that reflects your personality, eases daily chaos, and leaves a lasting positive impression on everyone who crosses your threshold.
Your entryway is the silent ambassador of your home—a carefully choreographed transition between the outside world and your personal sanctuary. It communicates care, intention, and identity before a single word is spoken. Yet so many homes treat this critical space as an afterthought: a dumping ground for discarded shoes, a tangled nest of keys and mail, a narrow passage rushed through without pause. This guide transforms that reality. Drawing on established principles of environmental psychology, recurring patterns in residential design, and functional workflows refined through practical application, we present a complete framework to craft an entryway that balances emotional resonance, practical utility, and authentic style. Whether you have a grand foyer or a three-foot hallway, this system provides actionable pathways to create a space that welcomes, organizes, and inspires—every single day.
Introduction: Why Your Entryway Matters More Than You Think
Consider the last time you entered a home that felt instantly right. Perhaps soft light glowed from a table lamp, a subtle scent of cedar lingered in the air, and a single framed photograph offered a quiet glimpse into the lives within. You likely felt a sense of calm, anticipation, or warmth—a feeling that preceded any interaction with the residents. Conversely, recall entering a space where coats blocked the path, floorboards creaked under scattered debris, and the only light came from a harsh overhead bulb. That immediate sensory experience shaped your entire perception of the home and its occupants before you’d even removed your shoes.
This isn’t merely subjective preference. Research in environmental psychology suggests that transitional spaces like entryways influence cognitive and emotional responses related to perceived safety, stress levels, and social connection. A thoughtfully designed entryway typically performs three interconnected functions: it signals (communicating values and care), it shields (creating psychological separation from external chaos), and it serves (streamlining daily routines). When these functions align, the entryway becomes a proactive contributor to household well-being rather than a passive corridor. Many homeowners report greater satisfaction with daily routines and a stronger sense of “arrival” when this space is intentionally designed. This isn’t about perfectionism or expensive renovations—it’s about strategic intentionality. By understanding the deeper role your entryway plays, you shift from reacting to clutter to designing a space that actively supports how you live. The journey begins not with paint swatches or furniture shopping, but with a clear-eyed assessment of what your space must accomplish for your life.
The First Impressions Framework: Three Interlocking Layers for Lasting Impact
Forget fragmented tips like “add a mirror” or “buy a console table.” True entryway mastery emerges when three foundational layers work in concert: the Psychological Layer (emotional resonance), the Functional Layer (practical workflow), and the Aesthetic Layer (visual harmony). These layers are interdependent—neglect one, and the entire system falters. A beautiful console table (Aesthetic) becomes useless if it blocks traffic flow (Functional), while perfect storage (Functional) feels cold without warmth (Psychological). This framework provides a repeatable methodology applicable to any space, budget, or style. It begins inward—with human experience—and expands outward to physical execution. By addressing all three layers systematically, you create an entryway that feels intuitively yours, operates seamlessly amid daily demands, and communicates authenticity without effort.
Layer 1: The Psychological Layer – Setting the Emotional Tone
Before measuring square footage or selecting colors, define the emotional experience you want your entryway to evoke. This layer answers the question: How should someone feel the moment they cross this threshold? Calm? Energized? Grounded? Curious? The answer shapes every subsequent decision. Design observation identifies four recurring emotional anchors for entryways, each with distinct sensory considerations:
Sanctuary Mode prioritizes decompression and transition. Ideal for high-stress households or urban dwellers returning from chaotic environments, this approach uses sensory cues to signal “you are now safe.” Soft, indirect lighting (like a dimmable wall sconce or small table lamp) replaces harsh overheads. Textural elements invite touch: a chunky knit basket for shoes, a smooth stone tray for keys, a wool-blend rug underfoot. Scent plays a subtle role—a single essential oil diffuser with lavender or cedar, or a small vase of eucalyptus. Sound matters too: a thick rug absorbs street noise; a well-fitted door seal minimizes drafts and external sounds. Why this works: Studies suggest consistent sensory transitions can support the brain’s shift from heightened alertness to a calmer state. One homeowner transformed a narrow apartment entry by adding a floor-length linen curtain beside the door. Pulling it closed after entering created a literal and psychological barrier from the noisy hallway—a simple ritual that contributed to a more defined “arrival moment.”
Invitation Mode radiates warmth and approachability. This suits households that host frequently or homes where the entryway flows directly into living areas. Visual openness is key: avoid tall furniture that blocks sightlines. Warm-toned lighting (2700K–3000K bulbs) mimics candlelight. Personal artifacts take center stage: a child’s drawing framed simply, a bowl holding smooth stones collected on family hikes, a vintage tray displaying current library books. The goal isn’t curated perfection but lived-in authenticity—evidence of a life warmly lived. Common mistake: Over-sanitizing the space. An entryway with sterile surfaces and nothing personal can feel impersonal. Instead, rotate seasonal items: pinecones in winter, a small vase of sunflowers in summer. This subtle dynamism signals attentiveness without demanding constant upkeep.
Clarity Mode reduces cognitive load through visual order. For individuals sensitive to visual stimulation, this approach emphasizes negative space, cohesive palettes, and concealed storage. Everything has a designated “home” behind closed doors or within uniform containers. Labels (discreet but clear) prevent decision fatigue: “Keys,” “Mail In,” “Donations.” Lighting is bright but shadow-free for task clarity. Nuance: Clarity doesn’t mean cold minimalism. A single textured element—a woven seagrass bin, a ceramic dish in a muted earth tone—adds soul without chaos. A teacher implemented Clarity Mode after noticing accumulated artwork near the door caused morning overwhelm. She installed a slim, lidded bench with internal compartments labeled for each child’s backpack and projects. The visual calm supported a smoother morning routine by creating predictable order.
Curiosity Mode sparks delight and narrative. Common in creative households or historic homes, this layer uses the entryway as a “prologue” to the home’s story. An unexpected element invites engagement: a vintage map displayed thoughtfully, a shadow box with meaningful objects, a narrow shelf holding rotating art pieces. Lighting highlights these focal points—a small picture light above artwork, a focused beam on a sculptural object. Critical balance: Curiosity should intrigue, not confuse. Limit focal points to one or two per entryway. Too many elements compete for attention, creating visual noise. One graphic designer transformed her home’s entry by installing a repurposed bench with a custom cushion. Above it, she hung a single large-scale historical photograph of the neighborhood. Visitors consistently comment on this intentional “storytelling” moment—it feels personal, historical, and deeply considered.
The Fundamental Principle: Your entryway’s emotional tone is not an accessory to design—it is the foundation upon which function and aesthetics must be built. Define the feeling first, and every physical choice becomes purposeful.
Layer 2: The Functional Layer – Creating Zones for Flow and Order
Psychology sets the intention; function executes it. The Functional Layer transforms abstract goals into physical workflows. Forget “storage solutions” as isolated products. Instead, map the journey of people and objects through your space. Observe for three days: Where do coats land? Where do shoes pile? Where does mail accumulate? Where do keys vanish? These friction points reveal your true functional needs. The solution lies in creating dedicated micro-zones—small, purpose-built areas that handle specific tasks without overlapping. Most entryways benefit from four core zones, adaptable to any footprint:
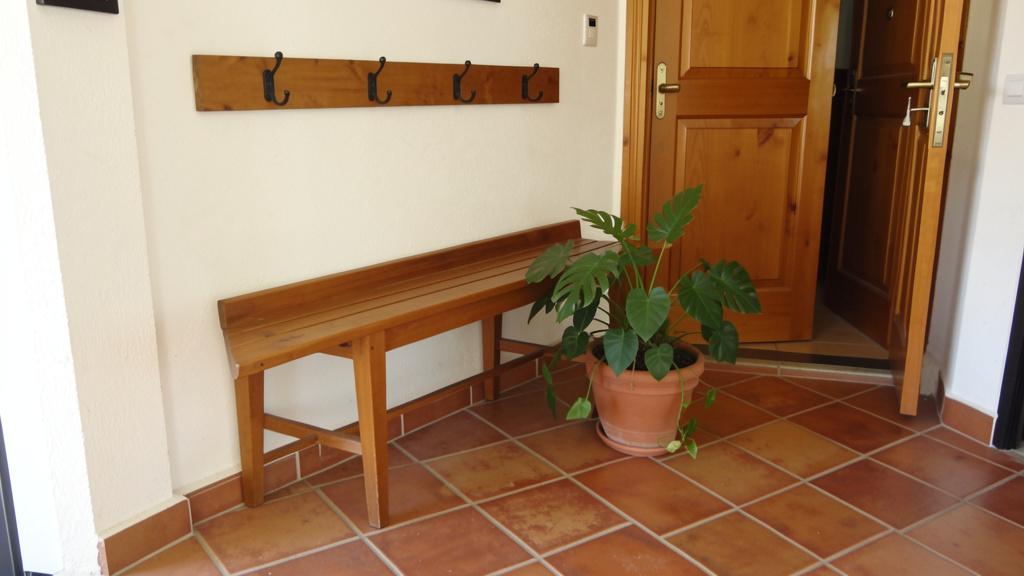
The Landing Zone (0–18 inches inside the door)
This is the critical “drop point” for items carried in. It must be immediately accessible, unobstructed, and forgiving of hurried moments. Ideal execution: A wall-mounted hook rail (not a freestanding rack that blocks flow) at varying heights for adults and children. Beneath it, a shallow tray (3–4 inches deep) catches small items: keys, sunglasses, leashes. Budget adaptation: Install two sturdy hooks and repurpose a vintage baking sheet as a tray—spray-painted for cohesion. Emergency fix: Place a small woven basket just inside the door labeled “Today’s Essentials.” Why depth matters: A tray deeper than 4 inches encourages hiding; shallow depth encourages visibility and quick processing. Common mistake: Placing the landing zone behind the door swing. Test door clearance first—nothing should impede opening.
The Transition Zone (18–48 inches from door)
This zone handles larger items requiring brief staging before moving deeper: backpacks, grocery bags, work bags, wet umbrellas. Ideal execution: A narrow console table (12–14 inches deep) with an open shelf below for labeled bins (“Library Books,” “Returns,” “Donations”). A small wall-mounted umbrella stand with a removable liner prevents water pooling. Budget adaptation: Use a salvaged wooden crate turned on its side as a console base; top with a sanded plank stained to match. Space-constrained solution: For entries under 3 feet wide, install heavy-duty wall hooks rated for substantial weight to hang bags directly. Pair with a slim magnetic strip mounted vertically on the wall for small metal tools. Critical nuance: The transition zone should not be permanent storage. Items here should move within 24 hours. Label bins with gentle reminders: “Process by Friday.”
The Preparation Zone (Adjacent to exit path)
This is the “launch pad” for departures—often overlooked. It reduces morning chaos by centralizing outgoing essentials. Ideal execution: A dedicated shelf or cubby labeled “Tomorrow.” Include a small chalkboard or whiteboard for last-minute notes (“Soccer practice 5 PM!”). A dedicated spot for outgoing mail prevents forgotten letters. Family adaptation: For households with children, add low hooks labeled with names or symbols. Place a small step stool nearby for little ones to reach hooks independently—fostering autonomy. Pro tip: Install a full-length mirror here. It serves dual purpose: final appearance check and visually expanding small spaces. Position it opposite a light source to maximize reflection.
The Containment Zone (Deepest part of entryway)
This handles bulk storage requiring concealment: seasonal outerwear, sports equipment, pet gear, bulk mail. Ideal execution: A floor-to-ceiling cabinet with adjustable shelves. Use uniform bins inside labeled with contents (“Winter Scarves,” “Beach Towels”). Apartment solution: A tall, narrow armoire (24 inches deep) fits where closets won’t. Line shelves with non-slip liner. Tiny space hack: Utilize vertical space above door height. Install a high shelf (accessible via small step stool) for rarely used items. Material insight: For humid climates, choose moisture-resistant materials: powder-coated metal bins, teak wood, or sealed bamboo. Avoid materials prone to warping in moisture.
Traffic Flow Analysis: The Invisible Blueprint
Before placing a single item, map human movement. Stand at your front door. Open it fully. Walk the most natural path into your home. Repeat with arms full. Now observe:
– Where do you instinctively step? (Keep this path clear)
– Where do you turn? (Place mirrors or art at turn points to guide flow)
– Where do obstacles force awkward maneuvers? (This reveals problem spots)
One household discovered their bench blocked the path to the kitchen—their most frequent route after school. Relocating the bench created a clear corridor, reducing dropped items and friction. Guideline: Maintain a minimum 36-inch clear path through the entryway. For accessibility or high-traffic homes, aim for 42–48 inches. Measure with tape on the floor before buying furniture. This simple step prevents frustration.
Layer 3: The Aesthetic Layer – Expressing Style with Intention
With psychology defined and function mapped, aesthetics become the joyful expression of your identity—not a random collection of trends. This layer answers: How does visual language reinforce the emotional tone and support the workflow? Style should feel inevitable, not imposed. Begin by identifying your core style archetype, then adapt its signature elements to entryway-specific constraints. Below is a detailed translation guide for six prevalent styles, moving beyond superficial “inspiration” to actionable implementation. Each includes essential elements, entryway-specific adaptations, common pitfalls, and budget-conscious substitutions.
| Style Archetype | Essential Elements | Entryway Adaptation | Budget Substitution | Pitfall to Avoid |
|---|---|---|---|---|
| Modern Organic | Natural textures (wood, stone, clay), organic shapes, neutral palette with earthy accents, uncluttered surfaces | Use a live-edge wood console; seagrass baskets; a single sculptural ceramic vase with dried botanicals | Sand and stain a thrifted wood crate; use foraged branches in a jar; source river rocks locally | Over-accessorizing. Limit to 3 textural elements max. Clutter negates the calm intent. |
| Coastal Transitional | Light woods, soft blues/whites, nautical hints (rope, driftwood), airy feel | Whitewashed console; striped cotton rug; glass jar holding sea glass from trips | Paint existing furniture white; use fabric remnants as a runner; display children’s beach drawings | Themed clichés. Avoid mass-produced “beach” decor. Authenticity comes from personal mementos. |
| Warm Minimalist | Monochromatic palette (creams, taupes, warm grays), hidden storage, intentional negative space, quality over quantity | Floor-to-ceiling cabinet with push-to-open doors; single large-scale art piece; textured wall finish | Paint existing cabinet same color as wall; use removable wallpaper on one accent wall; frame fabric swatches | Sterility. Add one “imperfect” element: hand-thrown pottery, slightly uneven woven mat. Warmth lives in subtle humanity. |
| Rustic Farmhouse | Reclaimed wood, black iron hardware, vintage textiles, functional artifacts | Repurposed wood panel; galvanized metal bin; quilt fragment framed as art | Distress new wood with vinegar/steel wool solution; use binder clips to hang keys; frame vintage seed packets | Overdoing “farm” motifs. One authentic artifact beats ten reproductions. Prioritize story over theme. |
| Global Eclectic | Handcrafted textiles, artisan objects from travels, layered patterns, warm metals | Leather pouf; handwoven runner; shadow box displaying collected postcards | Shop ethnic markets for fabric remnants; display meaningful souvenirs; use thrifted trays to group items | Cultural appropriation. Research item origins; support authentic artisans; focus on your travel memories. |
| Contemporary Traditional | Classic shapes with modern twists, rich wood tones, tailored textiles, symmetry | Refinished chest with updated hardware; matching sconces flanking mirror; wool runner | Update existing furniture with new hardware; use removable wallpaper inside cabinet doors; frame architectural prints | Stiff formality. Soften with organic elements: a bowl of citrus, a casually draped throw. Tradition should feel lived-in. |
Color Considerations in Practice
Color influences perceived space and emotion. In entryways, strategic choices solve common problems:
– Small or narrow entryways: Paint walls and ceiling the same light, warm-neutral color. This eliminates visual boundaries, making the space feel larger. Avoid stark white—it can feel clinical.
– Dark or windowless entries: Use reflective surfaces to amplify available light. A large mirror opposite the door doubles perceived space. Choose furniture with light wood tones or matte light finishes. Add a single warm-toned accent (terracotta vase, mustard tray) to prevent sterility.
– High-traffic zones: Select durable, forgiving finishes. For walls near doors, use scrubbable eggshell or satin paint. For floors, choose rugs with medium-tone patterns that hide dirt better than solids. Critical insight: Test paint samples at different times of day. A color that looks warm at noon may feel cool under evening light. Live with samples before committing.
Lighting: The Unseen Sculptor of Space
Lighting is the most underutilized entryway tool. Layer three types for maximum impact:
1. Ambient Lighting: Soft overall illumination. Replace harsh ceiling fixtures with a flush-mount fixture featuring fabric or paper shades to diffuse light. Dimmer switches allow mood adjustment from “bright task mode” to “soft welcome glow.”
2. Task Lighting: Focused illumination for specific actions. Install wall sconces at 60–66 inches height on either side of a mirror for shadow-free grooming. Under-shelf LED tape lights highlight contents without glare.
3. Accent Lighting: Drama and depth. A small picture light above artwork draws the eye upward. A discreet LED strip along the base of a console creates a “floating” effect and guides footsteps at night.
Tip for renters: Use plug-in wall sconces and smart bulbs that adjust color temperature via app—cool white for morning energy, warm white for evening calm. Prioritize warm color temperatures (2700K–3000K) in entryways; cooler temps can feel institutional.
Texture and Scale: Creating Tactile Harmony
A visually balanced entryway engages multiple senses. Combine at least three textures within arm’s reach of the door: smooth (ceramic dish), rough (woven basket), soft (wool rug). This invites interaction and feels considered. Scale matters immensely in confined spaces:
– Ceiling height under 8 feet: Choose low-profile furniture (bench under 18″ tall). Hang art lower—center point at 57–60 inches—to avoid emphasizing low ceilings.
– Long, narrow entries: Place a narrow console (max 14″ deep) against the longest wall. Use a runner rug that stops 6 inches short of walls to define the space without crowding.
– Wide but shallow entries: Float furniture away from walls. A round entry table (30–36″ diameter) centered creates a natural focal point and improves flow.
Example: A homeowner had a 4×8 foot entry that felt tunnel-like. She replaced a tall bookshelf with a low bench, added a round mirror to reflect light deeper, and installed vertical paneling on one wall. The vertical lines drew the eye upward, while circular elements softened the rectangle—transforming claustrophobia into cozy intentionality.
Assessing Your Entryway’s Unique Blueprint: Size, Traffic, and Climate Considerations
No framework works universally without adaptation. Your home’s physical reality—square footage, household composition, geographic location—dictates precise implementation. Treat this section as your diagnostic toolkit. Answer these questions honestly before purchasing a single item:
Spatial Reality Check
– Measure precisely: Width at narrowest point, depth from door to first obstruction, ceiling height. Note door swing direction (left/right, in/out).
– Traffic count: How many people regularly use this entrance? (Include pets)
– Peak usage times: When is chaos highest? (e.g., school rush, work return)
– Adjacent spaces: What room does the entryway feed into? (Kitchen = grocery drop zone; Living room = guest impression zone)
Climate and Environmental Factors
Your local environment demands specific material choices:
– Snow/Ice Regions: Prioritize wipeable surfaces. Choose rubber-backed rugs. Install a wall-mounted boot tray with drainage. Store ice melt in a lidded container near the door. Material note: Avoid solid wood furniture directly on concrete slabs—it can warp from moisture. Use furniture pads.
– Humid Climates: Mold and mildew are concerns. Select storage made of powder-coated metal, teak, or sealed bamboo. Avoid fabric bins for shoes—opt for ventilated baskets. Place silica gel packs inside closed cabinets. Ensure rugs have natural fiber backings that breathe better than synthetic rubber.
– Arid/Dusty Regions: Dust accumulation accelerates. Choose smooth surfaces (glass, metal, sealed wood) over textured weaves that trap particles. Install a small bench with a wipeable cushion near the door for removing dusty shoes. Keep a microfiber cloth nearby for quick wipe-downs.
– Urban Settings (Apartments, Row Homes): Noise and privacy concerns dominate. Add weatherstripping to doors to block hallway sounds. Use heavy fabric curtains on interior doors for sound absorption. For ground-floor entries, position furniture to avoid direct sightlines from street-level windows.
Household-Specific Adaptations
– Families with Young Children: Lower hooks to 36 inches. Use picture labels (a shoe icon, a backpack icon) for pre-readers. Choose rounded-edge furniture. Store hazardous items in high, secured cabinets. Insight: Place a small step stool by the sink in adjacent bathrooms—children can wash hands immediately after entering.
– Multi-Generational Households: Install grab bars disguised as towel racks near seating areas. Ensure all pathways are completely clear of tripping hazards (rugs must be fully secured). Use contrasting colors between floor and furniture edges to aid depth perception.
– Pet Owners: Dedicate a “pet station” within the containment zone: a lidded bin for leashes/toys, a small mat for paw wiping, a discreet hook for harnesses. Choose rugs with tight weaves (flatweave, sisal) that resist snagging. Place a small handheld vacuum nearby.
– Remote Workers/Students: Integrate a “command center” in the transition zone: a slim wall-mounted file holder for pending documents, a charging station with labeled cords, a small bulletin board for deadlines. Position it away from high-traffic paths.
Case Study: The Narrow Apartment Entryway
Consider a creative professional living in a compact urban apartment with a 28-inch wide entryway shared with a partner and pets. Initial attempts (a narrow shelf, wall hooks) created clutter and blocked the path to the kitchen. Using the framework:
1. Psychological Goal: Sanctuary Mode—needed decompression after crowded commutes.
2. Functional Audit: Observed that keys/mail landed on the floor; shoes piled by the door; leashes got tangled.
3. Spatial Solution:
– Installed two heavy-duty hooks at varying heights on the wall beside the door—not in the path.
– Mounted a shallow floating shelf above hooks for keys/mail. Added a small magnetic strip below for leash clips.
– Placed a flatweave rug (secured with double-sided tape) just inside the door.
– Used the opposite wall for vertical storage: a narrow corkboard for notes, topped with a slim shelf holding supplies in labeled bins.
4. Aesthetic Touch: Painted the entire entryway in a warm neutral. Added a single low-maintenance air plant in a tiny ceramic pot—living texture without upkeep.
Result: A functional, calming space that processes arrivals efficiently. The vertical focus draws the eye up, making the narrow space feel intentional. The resident reports significantly reduced “entryway anxiety” during busy mornings.
Deep Dive: Translating Popular Styles into Your Entryway
Moving beyond the style table, let’s explore how two contrasting archetypes manifest with specific spatial reasoning and adaptive techniques. This demonstrates how the framework operates in practice—not as a shopping list, but as a design logic.
Case Study 1: Modern Organic in a Suburban Home
Context: Household with active teenagers valuing calm and sustainability.
Entryway Reality: 6×8 foot foyer with 9-foot ceiling, hardwood floor, adjacent to living room. Previous setup: cluttered hall tree, mismatched bins, overhead fluorescent light.
Psychological Goal: Sanctuary Mode—create a decompression zone separating busy family life from home tranquility.
Functional Workflow:
– Landing Zone: Wall-mounted hook rail at varying heights. Beneath it, a shallow wood tray catches keys.
– Transition Zone: Live-edge console (14″ deep) with open shelf below holding two unlidded seagrass bins labeled “School” and “Sports.”
– Preparation Zone: Full-length leaning mirror opposite the door. Small chalkboard mounted beside it for schedules.
– Containment Zone: Floor-to-ceiling cabinet with push-latch doors hiding seasonal gear and supplies.
Aesthetic Execution:
– Walls painted in warm clay tone.
– Lighting: Replaced overhead with woven rattan flush-mount fixture. Added two wall sconces with linen shades flanking the mirror.
– Textures: Jute rug with subtle pattern; ceramic dish holding river stones; single dried botanical in a tall ceramic vase.
– Why it works: The warm walls absorb light softly. Natural materials provide tactile variety without visual noise. The cabinet’s seamless design eliminates visual clutter—critical for Sanctuary Mode. The mirror reflects the living room’s greenery, extending the sense of space. Adaptation insight: They initially wanted open shelving but realized visible clutter triggered stress. Closed storage with one intentional open shelf achieved balance.
Case Study 2: Global Eclectic in an Urban Loft
Context: Creative individual who hosts friends and collects textiles from travels.
Entryway Reality: 4×10 foot corridor entry with exposed brick wall, concrete floor, high ceiling. Previous setup: overflowing coat rack, shoes scattered near door.
Psychological Goal: Curiosity Mode—spark conversation and reflect a life of exploration.
Functional Workflow:
– Landing Zone: Vintage brass hooks mounted on brick wall. Small hammered copper tray below.
– Transition Zone: Narrow reclaimed cart on casters holds a woven blanket and a bin for library books.
– Preparation Zone: Full-length antique mirror leans against brick wall. Small magnetic board holds outgoing mail and sketches.
– Containment Zone: Tall, narrow armoire (painted deep indigo) stores off-season clothing and art supplies. Inside, vintage suitcases stack vertically for categorized storage.
Aesthetic Execution:
– Brick wall left exposed as textured backdrop. Opposite wall painted deep charcoal to make art “pop.”
– Lighting: Industrial-style plug-in wall sconce provides task light. String lights draped subtly along ceiling beam add twinkle.
– Textures: Hand-knotted runner; macramé wall hanging; collection of small clay pots displayed on a floating shelf.
– Why it works: The indigo armoire creates a strong visual anchor. Layered textiles add warmth to industrial materials. Personal artifacts tell authentic stories. The rolling cart adapts to needs—moved aside for parties, positioned for daily use. Critical nuance: Rotating displayed items seasonally keeps the space feeling fresh and intentional. Pitfall avoided: Every item has a personal memory attached—making the space deeply personal rather than appropriative.
Problem-Solving Scenarios: Real Homes, Real Challenges
Theory meets reality in these detailed solutions to frequent entryway frustrations. Each scenario includes root cause analysis, step-by-step remediation, and preventative maintenance.
Scenario 1: “The Shoe Avalanche” – Entryway overwhelmed by footwear
Root Cause: No designated, accessible storage matched to shoe types and user heights.
Solution Framework:
1. Categorize First: Sort shoes into zones: Daily Wear (within easy reach), Seasonal (stored higher/lower), Specialty (sports, formal—labeled bins).
2. Vertical Strategy: Install a combination system:
– Lower 18″: Open cubbies (one per person) with non-slip liners. Size cubbies to fit largest shoe type.
– Middle 18–48″: Slanted shoe shelves maximize visibility and access.
– Upper 48″+: Lidded bins labeled “Winter Boots,” “Beach Shoes.”
3. User-Specific Tweaks:
– For children: Use picture labels. Place a small step stool nearby.
– For high heels: Install narrow vertical slots to prevent tipping.
– For wet/muddy shoes: Dedicate one cubby with a removable plastic tray for easy cleaning.
4. Behavioral Nudge: Place a small basket labeled “Donation” in the zone. When cubbies overflow, remove one pair before adding new ones.
Prevention: Implement a “Sunday Reset”—5 minutes as a family to sort shoes, wipe cubbies, and process donations. Makes maintenance habitual.
Scenario 2: “The Mail Vortex” – Papers pile up, bills get lost
Root Cause: No immediate processing system at point of entry.
Solution Framework:
1. The 60-Second Sort: Create a wall-mounted station within arm’s reach of the door:
– Slot 1: Action Needed (bills to pay, forms to sign)
– Slot 2: File (insurance docs, warranties)
– Slot 3: Shred (pre-addressed envelopes, junk mail)
– Slot 4: Recycle (magazines, catalogs)
2. Tools Integration: Mount a small clipboard with a pen on a retractable cord beside the slots. Include a handheld hole punch and mini stapler in a shallow tray below.
3. Digital Bridge: Place a small notepad labeled “Scan Later” for documents needing digital backup. Pair with a weekly 15-minute “scan session.”
4. Outgoing System: A dedicated clip or small mailbox labeled “Outgoing” holds mail needing postage. Place stamps nearby.
Critical Insight: Empty all slots every Friday. File documents immediately after sorting. For minimal mail volume, simplify to two slots: Keep and Toss.
Scenario 3: “The Narrow Passage” – Entryway is a tight hallway with no wall space
Root Cause: Attempting to force standard furniture into a space designed for flow.
Solution Framework:
1. Think Vertically, Not Horizontally:
– Door Surface: Install an over-the-door organizer with clear pockets for keys, sunglasses, leashes. Choose one with solid backing.
– Ceiling Height: Mount hooks 72+ inches high for rarely used items. Use a discreet step stool stored nearby.
– Floor Plane: Place a slim rectangular tray just inside the door. Its sole purpose: catch items temporarily while you move deeper to process them. Empty nightly.
2. Furniture Alternatives:
– Replace bench with a wall-mounted flip-down seat (folds flat when not in use).
– Use tension rods inside closet doors to create hanging zones.
3. Optical Illusions:
– Paint the entire hallway (walls, ceiling, trim) in one light, warm-neutral color.
– Install a long, narrow mirror along the fullest wall.
– Use a runner rug that runs the length of the hall to draw the eye forward.
4. Behavioral Shift: Accept that this space is purely transitional. Designate the next room as the true processing zone. The hallway’s job is simply to guide movement smoothly.
Scenario 4: “Rental Restrictions” – Cannot install hooks, paint, or modify structure
Solution Framework:
1. Furniture as Anchor: Use a narrow console table (wheels optional) as your functional core. Choose one with storage (drawer for keys, shelf for bins).
2. Adhesive Solutions:
– Damage-free adhesive hooks: Test weight limits. Use multiple small hooks instead of one large one. Remove slowly with hairdryer on low heat.
– Removable wallpaper: Apply to the inside of cabinet doors or console top for pattern without wall commitment.
– Peel-and-stick tiles: Create a faux “runner” on the floor. Easily removed when moving.
3. Portable Systems:
– Rolling cart holds bins for shoes, mail, pet gear. Move as needed.
– Freestanding coat rack placed just inside the door (ensure it doesn’t block path). Choose one with a lower shelf for shoes.
4. Lighting Hacks: Plug-in wall sconces eliminate hardwiring. Battery-operated LED puck lights inside open shelves provide task lighting. Smart bulbs in existing fixtures allow ambiance control.
Tip: Document the space thoroughly before moving in. When moving out, restore exactly to original condition. Keep all original hardware.
Budget-Conscious Pathways: Luxury, Mid-Range, and DIY Approaches
Style and function need not correlate with expense. This tiered approach ensures dignity and intentionality at every budget level. Focus spending on impact zones—areas visible immediately upon entry—and save on hidden elements.
The Philosophy of Strategic Spending
- High-Impact Zones (Worth Investing In): Lighting (sets mood instantly), floor covering (first tactile experience), one focal point (mirror, art, console).
- Low-Impact Zones (Save Here): Internal storage bins (hidden inside cabinets), basic hooks, simple trays.
- Universal Truth: A single well-chosen, meaningful item beats ten cheap, impersonal ones. A vintage bowl from a thrift store holding keys feels more intentional than a mass-produced “entryway set.”
Tier 1: Thoughtful DIY ($0–$150)
Philosophy: Resourcefulness over retail. Leverage what you own; transform discards into assets.
– Console Alternative: Stack two sturdy wooden crates (sand smooth, stain or paint). Top with a sanded plywood plank. Line crate interiors with fabric scraps.
– Storage Bins: Repurpose cardboard boxes. Cover with contact paper, fabric, or wallpaper scraps. Add handles cut from leather scraps or twine. Label with chalkboard paint squares.
– Wall Art: Frame children’s artwork, fabric swatches, or pages from old books. Use thrifted frames spray-painted uniformly. Create a gallery wall with varying sizes.
– Rug Solution: Use a large, durable cotton blanket as a runner. Secure edges with double-sided rug tape. Washable and replaceable.
– Lighting Hack: Update an existing lamp with a new shade. Use smart bulbs for ambiance control without rewiring.
Real Example: A student transformed his apartment entry for under $40:
– Found a small wooden stool curbside; sanded and painted matte black
– Covered a cereal box in burlap fabric for a “keys” tray
– Hung three thrifted frames with family photos
– Secured a vintage wool blanket as a rug with rug tape
– Installed two adhesive hooks
Result: A cohesive, personal space that felt intentionally designed.
Tier 2: Curated Mid-Range ($150–$600)
Philosophy: Invest in 2–3 quality foundational pieces; supplement with affordable accents. Prioritize durability in high-use items.
– Console Table: Seek solid wood options over particleboard. Many retailers offer durable, stylish consoles in this range. ($150–$300)
– Storage: Stylish woven bins from home goods stores. Clear bins with labels create instant order. ($20–$50 per bin)
– Lighting: Plug-in wall sconces or entry-level fixtures provide designer aesthetic without custom cost. ($80–$150 each)
– Rug: Washable rug systems or durable cotton rugs solve high-traffic anxiety. ($100–$250)
– Smart Spending Tip: Buy the console and rug first—they define the space. Add lighting and art gradually. Wait for seasonal sales.
Insight: “Open box” or floor model sections at furniture stores offer significant discounts on display items. Minor scratches are easily touched up.
Tier 3: Intentional Investment ($600+)
Philosophy: Commission pieces that solve specific problems while becoming heirlooms. Value craftsmanship, customization, and sustainability.
– Custom Cabinetry: Work with a local carpenter to build floor-to-ceiling storage tailored to your exact dimensions. Use sustainably sourced wood and low-VOC finishes. ($1,500–$4,000+)
– Artisan Pieces: Commission a local woodworker for a console. Support a ceramicist for a unique key dish. These pieces carry story and soul. ($300–$1,200)
– Lighting: Invest in hardwired, dimmable sconces from reputable lighting brands. Proper placement elevates the entire space. ($200–$600 per fixture)
– Rug: Hand-knotted wool or vintage rugs gain character with age. Source from dealers who verify origin and fair labor practices. ($500–$2,000+)
– Critical Question Before Spending: “Will this solve a documented friction point in my workflow?” Avoid “pretty object” purchases. Every investment should serve psychology, function, and aesthetics.
Sustainability Note: For high-investment items, prioritize repairability. Ask: “Can this be refinished? Can hardware be replaced?” Choose timeless designs over trends.
Maintaining Momentum: Keeping Your Entryway Fresh and Functional
An entryway isn’t a “set and forget” project. Life evolves—seasons change, families grow, routines shift. Sustainable design includes built-in adaptability and low-effort maintenance rhythms. This section provides systems to keep your entryway working for you long after the initial setup.
The 5-Minute Daily Reset Ritual
Integrate this into existing habits to prevent accumulation:
– Upon waking: Straighten the rug. Wipe console surface.
– Before leaving home: Process mail immediately. Return stray items to zones.
– Upon returning home: Execute the “landing sequence”: Shoes in cubby, keys in tray, bag on hook. Takes 30 seconds.
– Before bed: Empty the “Donation” basket. Toss expired mail. Fluff any textiles.
Why it works: Anchoring tiny tasks to existing habits (brushing teeth, making coffee) builds consistency without mental load. The entryway stays functional because maintenance is frictionless.
Seasonal Refresh Framework
Align your entryway with natural rhythms to maintain relevance and joy:
– Spring: Deep clean. Wash rugs, wipe down walls, polish hardware. Swap heavy textiles for lighter linens. Display fresh greenery. Update notes with upcoming plans.
– Summer: Focus on cooling elements. Add a small tray with sunscreen. Display seashells or vacation photos. Use lighter-colored bins for visual coolness.
– Fall: Introduce warmth. Swap rug for a thicker weave. Add a small basket of cozy throws. Display natural elements like pinecones. Update lighting to warmer bulbs.
– Winter: Prioritize function. Place a boot tray near the door. Store ice melt in a lidded container. Add a small basket for hats/gloves. Use evergreen sprigs for scent and color.
Tip: Keep a “seasonal bin” in storage containing off-season textiles and functional items. Swap contents in under 15 minutes. This prevents decision fatigue.
Evolving with Life Changes
Design flexibility into your system from the start:
– New Baby: Add a low hook for a diaper bag. Dedicate one bin for baby essentials. Use picture labels for pre-verbal caregivers.
– Teenager Gaining Independence: Involve them in designing their zone. Let them choose hook style or bin color. This fosters ownership.
– Aging in Place: Gradually introduce supports: replace round knobs with lever handles, add discreet grab bars near seating, ensure clear pathways.
– Remote Work Expansion: Integrate a slim file holder for pending documents. Add a small charging station with labeled cords. Position away from high-traffic paths.
Key Mindset: View your entryway as a living system. Schedule a quarterly “Entryway Audit”: Walk through with fresh eyes. Ask: “What friction have I noticed? What new need has emerged?” Adjust one element. Small, consistent tweaks prevent major overhauls.
When to Let Go: The Donation Protocol
Clutter creeps back when we fail to release items. Implement this gentle but firm system:
1. Place a dedicated “Donation Bin” in the containment zone.
2. Anytime an item hasn’t been used in 90 days, or no longer serves its purpose, place it in the bin immediately.
3. When the bin is full (or monthly), take it directly to donation—do not revisit contents.
4. For sentimental items: Take a photo before donating. Keep the memory, release the object.
Insight: Decision fatigue causes accumulation. The “90-day rule” removes emotional debate. The physical bin creates a tangible action point. Consistency builds confidence.
Your Questions, Answered
Q: How do I choose an entryway rug that won’t get destroyed by dirt and moisture?
A: Prioritize material and construction. For high-traffic or moisture-prone areas, select flatweave rugs (like dhurrie, kilim, or sisal) with tight weaves that resist trapping dirt. Avoid deep-pile rugs which hide debris and are hard to clean. For washability, consider rug systems with replaceable tops or machine-washable cotton options. Always use a non-slip pad underneath—this prevents tripping hazards and reduces wear. In snowy climates, place a small, easy-to-shake outdoor mat outside the door and an absorbent indoor mat inside the threshold for a two-stage cleaning system.
Q: My entryway has no natural light. How can I make it feel less like a cave?
A: Layer lighting strategically to create depth and warmth. Replace any single overhead fixture with multiple light sources: wall sconces flanking a mirror (provides task light and reflection), a small table lamp on a console (casts soft ambient glow), and discreet LED tape lights under shelves (creates dimension). Choose warm color temperatures (2700K–3000K) exclusively—cool white amplifies sterility. Paint walls and ceiling in the same light, warm-neutral shade to eliminate visual boundaries. Add reflective surfaces: a large mirror opposite the light source, glass-front cabinets, or metallic accents. Finally, introduce a single warm accent color (terracotta, ochre) in a small artwork or ceramic piece to prevent flatness.
Q: What’s the minimum amount of space needed for a functional entryway?
A: Functionality depends on smart zoning, not square footage. Even a 24-inch wide corridor can work with vertical solutions: over-the-door organizers for shoes/accessories, wall-mounted hooks at varying heights, a shallow floating shelf for keys/mail, and a slim floor tray for temporary drop-off. The critical factor is maintaining a clear 30-inch path for safe passage. Measure your space precisely, then prioritize one core function based on your biggest pain point (e.g., if shoes are the issue, focus all solutions on footwear storage). Accept that very small entries serve primarily as transition zones—the “processing” may happen just inside the adjacent room. Clarity of purpose beats forced furniture placement.
Q: How do I keep my entryway looking tidy when I have young children?
A: Design for autonomy and forgiveness. Install hooks at child height (30–36 inches) with picture labels (a shoe icon, a backpack icon). Use open bins (not lidded) so children can see and access items independently. Choose durable, wipeable materials: powder-coated metal bins, sealed wood surfaces, indoor/outdoor rugs. Embrace “controlled chaos”—designate one small bin labeled “Today’s Treasures” for rocks or artwork brought home. Process it together every Friday. Most importantly, involve children in the 5-minute evening reset: “Let’s put shoes to bed!” turns tidying into connection. Perfection isn’t the goal; consistent, gentle routines build lifelong habits.
Q: Should I match my entryway style to the rest of my home?
A: Cohesion matters more than exact matching. Your entryway should feel like a natural prologue to your home’s story. Achieve cohesion through:
– Color continuity: Pull one accent color from adjacent rooms into the entryway.
– Material echoes: Repeat a key material (oak wood, black metal, woven texture) in at least one entryway element.
– Scale harmony: Ensure furniture proportions feel related.
However, the entryway can—and often should—have its own distinct personality. It’s the “cover” of your home’s book. A bold accent wall or a striking art piece here creates anticipation. The goal is visual conversation, not carbon copying.
Q: What’s the most common entryway mistake homeowners make?
A: Prioritizing aesthetics over workflow. Installing a beautiful console table that blocks the natural path, or choosing a delicate fabric bin that can’t withstand daily use, creates friction that leads to system abandonment. Always start with functional zoning: map traffic flow, identify drop points, and solve friction first. Then layer aesthetics around that functional skeleton. A slightly less “perfect” style executed with seamless function will bring more daily joy than a magazine-worthy setup that fights your natural habits. Observe how your household actually moves for one week before buying anything.
Q: How often should I deep clean my entryway?
A: Implement a tiered cleaning schedule:
– Daily: Quick wipe of surfaces; shake out rug; return stray items.
– Weekly: Vacuum/mop floors thoroughly; wipe down hooks and hardware; process mail bin.
– Monthly: Wash rugs (if machine-washable); dust light fixtures; check non-slip pads.
– Seasonally: Deep clean walls and baseboards; inspect furniture for wear; rotate seasonal items.
Attach entryway cleaning to existing routines: vacuum the entryway when you vacuum the adjacent room; wipe surfaces while waiting for coffee. Small, consistent efforts prevent overwhelming buildup.
Q: Can I have plants in a low-light entryway?
A: Yes—with strategic plant selection. Low-light tolerant varieties include snake plants, ZZ plants, pothos, and peace lilies. Place them on surfaces where they receive some indirect light (near a hallway opening, under a sconce at night). Avoid direct sun exposure. For truly dark entries, high-quality faux plants have improved dramatically—look for silk varieties with realistic texture. Place them in a beautiful ceramic pot. A single well-chosen plant (real or faux) adds life and softness without demanding high maintenance.
Q: How do I handle guest coats when I have limited closet space?
A: Create a dedicated “guest zone” that feels intentional. Install a row of sturdy hooks (minimum 3–4) in a visible but non-obstructive location—beside the door, on a partition wall, or on the back of a nearby closet door. Place a small bench or stool beneath for shoe removal. Add a discreet sign: “Welcome! Please hang coats here.” For large gatherings, keep a portable garment rack stored nearby that can be set up temporarily. The key is making guests feel their belongings are welcomed. A small tray with mints or hand lotion nearby adds thoughtful hospitality.
Q: What’s the ideal height for hanging art or mirrors in an entryway?
A: The center point of the artwork or mirror should be 57–60 inches from the floor. This aligns with average eye level. For spaces with very high ceilings (10+ feet), you can raise it slightly to 62 inches. For mirrors specifically: ensure the bottom edge is low enough to see your full face when standing naturally (typically 48–52 inches from floor). Test placements with painter’s tape before hammering nails. In narrow entries, choose vertically oriented art to draw the eye upward; in wide entries, horizontal pieces can balance the space.
Q: How can I make my entryway feel larger without renovation?
A: Focus on optical strategies: Paint walls, trim, and ceiling the same light, warm-neutral color to eliminate visual boundaries. Install a large mirror opposite the main light source to reflect depth and light. Choose furniture with slender profiles and light finishes (e.g., a console under 14 inches deep). Use vertical elements—tall art, floor-to-ceiling storage, or vertical paneling—to draw the eye upward. Keep surfaces minimally styled; clutter visually shrinks space. A single well-placed light source (like a wall sconce) creates dimension without overwhelming the area.
Q: What’s one small change that makes the biggest difference?
A: Implementing a dedicated “landing zone” tray within arm’s reach of the door. This simple container—whether a ceramic dish, woven basket, or shallow wooden tray—catches keys, sunglasses, and small essentials the moment you enter. It prevents the “scatter effect” of items landing on floors or counters. The psychological impact is significant: it creates an immediate sense of order and intentionality. Pair it with one wall hook for tomorrow’s bag or coat, and you’ve established a functional anchor that supports the entire system. Start here before expanding to other zones.
Conclusion and Your 24-Hour Action Plan
Your entryway is far more than a passageway—it is the daily ritual of arrival and departure, the silent communicator of your values, the practical anchor for household flow. By applying the First Impressions Framework—layering psychological intention, functional precision, and aesthetic authenticity—you transform this space from an overlooked corridor into a source of calm, efficiency, and pride. Remember the core truth: perfection is not the goal. Intentionality is. A slightly imperfect system that works for your life holds infinitely more value than a flawless display that gathers dust behind closed doors. The most successful entryways evolve with grace, adapting to seasons, growth, and changing needs while maintaining their core purpose: to welcome you home.
Recap: The Three Non-Negotiables
- Define the Feeling First: Before measuring or shopping, clarify the emotional experience you want (Sanctuary, Invitation, Clarity, or Curiosity). Let this guide every decision.
- Map the Micro-Zones: Identify your Landing, Transition, Preparation, and Containment zones based on observed behavior—not idealized routines. Solve real friction points.
- Prioritize Flow Over Furniture: Maintain clear pathways. Choose pieces that serve documented needs. When in doubt, leave space empty rather than crowded.
The 24-Hour Rule: Your Tiny, Transformative Action
Within the next 24 hours, complete this single, specific task:
Clear everything from your entryway floor and surfaces. Wipe down all empty spaces. Then, place only one intentional item back: a small tray for keys, a single hook for tomorrow’s bag, or a folded blanket on a bench.
Do not restock bins. Do not rearrange furniture. This radical simplification creates mental clarity and reveals the space’s true potential. It breaks the cycle of accumulation and establishes a clean baseline. Tomorrow, you’ll add back only what serves your documented workflow. This tiny action builds momentum far more powerfully than a weekend overhaul. You’ve just reclaimed agency over your space.
The Big Picture: Your Home, Your Narrative
Every time you cross your threshold, you participate in a quiet ritual of transition. An intentional entryway honors that ritual. It says to your family: “Your comfort matters.” It says to guests: “You are welcome here.” It says to yourself: “This space supports my well-being.” In a world of constant motion, this small zone of intentionality becomes a profound act of self-care—a daily reminder that how we inhabit our spaces shapes how we inhabit our lives. Start small. Build consistently. Trust the process. Your perfect entryway isn’t found in a catalog; it’s cultivated, one thoughtful choice at a time.
Explore Our Complete System:
The Ultimate Guide to Hallway Storage Solutions | Choosing the Perfect Entryway Lighting: A Designer’s Checklist | 10 Entryway Mistakes That Make Your Home Feel Unwelcoming (And How to Fix Them) | Seasonal Entryway Decor: A Rotating Calendar for Year-Round Freshness | Small Space, Big Impact: Entryway Hacks for Apartments and Tiny Homes | From Clutter to Calm: A 7-Day Entryway Organization Challenge | The Psychology of Color in Home Design: How Hues Influence Mood