Your Step-by-Step Framework for Protecting Natural and Manufactured Stone Surfaces Indoors and Out
Stone surfaces—whether gleaming marble countertops, rugged slate patios, or elegant limestone floors—bring enduring beauty and character to homes and landscapes. Yet without informed care, these materials can suffer stains, etching, weathering, or structural compromise. This guide synthesizes material science principles, conservation-informed practices, and adaptable maintenance strategies into a clear, actionable system. You’ll learn how to assess your stone’s unique properties, select appropriate protection, and implement sustainable routines that honor the material’s nature while preserving its integrity. Confidence replaces uncertainty through understanding—not perfection.
Introduction: Why Stone Demands a Thoughtful Approach
Natural stone carries geological history in its veins, fossils, and textures. Its variability—porosity, mineral composition, surface finish—is not a flaw but a defining characteristic. This inherent diversity means maintenance must be tailored: sealing dense granite differs fundamentally from protecting porous travertine. Similarly, engineered stone (quartz composites, terrazzo) requires distinct protocols due to resin binders and non-porous structures.
Environmental context further shapes care needs. Limestone in humid coastal zones contends with salt exposure and moisture retention; the same stone in freeze-thaw climates faces expansion stress from trapped water. Indoor surfaces encounter acidic spills, abrasive foot traffic, or cleaning chemical interactions.
This framework draws from conservation methodologies used in architectural preservation and aligns with guidance from organizations like the Natural Stone Institute and ASTM International. Recommendations prioritize material compatibility, safety, and long-term resilience over quick fixes. The goal is stewardship: preserving structural integrity and aesthetic character while acknowledging that stone evolves with use. Whether maintaining a new installation or revitalizing an existing surface, this approach provides clarity amid conflicting advice.
The Preservation Triad: A Framework for Lasting Stone Beauty
Effective stone care rests on a cyclical, proactive system: Assess, Protect, Maintain. These interdependent pillars create resilience. Skipping assessment risks misapplication; sealing without maintenance accelerates wear; maintenance without reassessment misses evolving needs.
Think of tending stone like nurturing a living landscape: soil testing precedes planting (Assess), protective mulch conserves moisture (Protect), and seasonal pruning sustains health (Maintain). The Triad transforms care from reactive chores into intentional practice.
The Fundamental Principle: Stone preservation is a continuous dialogue between material, environment, and care. Mastery lies in observing what the stone communicates through its condition.
Pillar 1: Assessment – Knowing Your Stone Inside and Out
Thorough assessment prevents irreversible errors. Rushing this phase is the most frequent cause of damage. Proceed methodically.
Step 1: Identify Stone Type and Composition
Determine whether the surface is natural stone (granite, marble, limestone, travertine, slate, sandstone, quartzite) or manufactured (engineered quartz, terrazzo). When uncertain:
– Consult installation records or supplier documentation.
– Use non-invasive observational tests:
– Granite: Speckled crystalline appearance; typically scratch-resistant.
– Marble: Swirling veins; reacts to acids (etching); cooler tactile feel.
– Limestone/Travertine: Fossil fragments or honeycomb voids (often filled); uniform color; softer texture.
– Slate: Layered cleft surface; splits along planes; produces a sharp ring when tapped gently.
– Quartzite: Resembles marble but significantly harder; subtle glitter from quartz crystals.
– Engineered Quartz: Uniform particle distribution; consistent color through chips; non-porous feel.
Why This Step is Crucial: Misidentification leads to damaging choices. Acidic cleaners on marble cause permanent etching; sealers designed for porous stone may leave residue on non-porous engineered surfaces. Industry resources like the Natural Stone Institute’s identification guides offer visual references for verification.
Common Mistake to Avoid: Relying solely on color or trade names. “Black granite” may be gabbro; “Carrara-style” labels often mask marble or quartzite. When uncertain, proceed to porosity testing.
Step 2: Determine Porosity and Absorption Rate
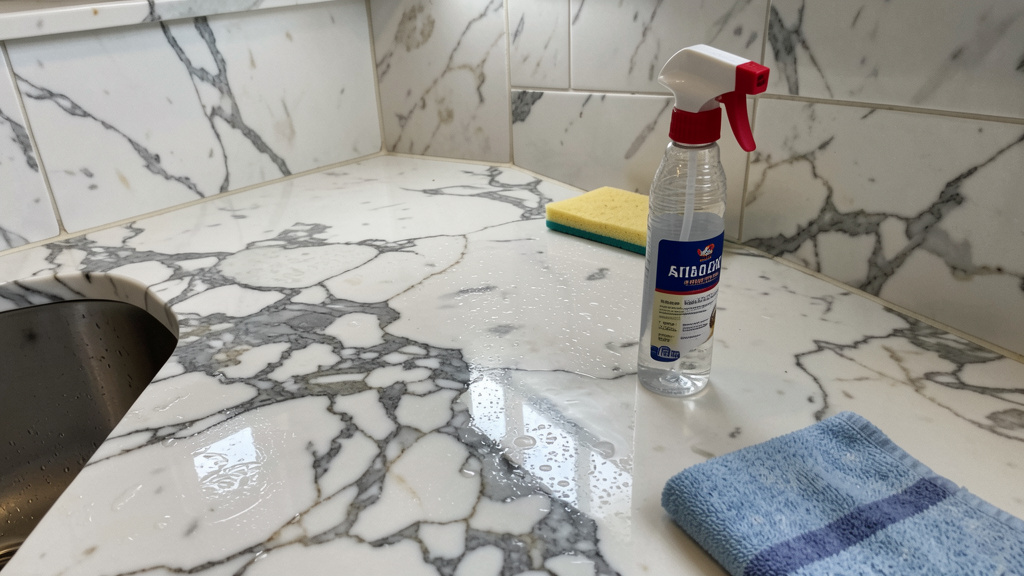
Porosity dictates sealer necessity and type. Conduct a water absorption test:
1. Ensure the surface is completely dry (24+ hours in humid conditions).
2. Place 3–4 water drops on inconspicuous areas.
3. Observe for 10–15 minutes:
– High absorption: Darkening within 1–3 minutes (travertine, sandstone, tufa).
– Moderate absorption: Darkening in 5–10 minutes (limestone, some marbles, slate).
– Low absorption: Minimal darkening after 15 minutes (dense granite, quartzite).
– Negligible absorption: Water beads persistently (engineered quartz, polished slate).
Practical Insight: In high-humidity environments, extend observation to 20 minutes. For honed finishes, slow absorption may reflect surface texture rather than low porosity—combine with visual identification. Outdoor stone should be tested 48 hours after rain to ensure full dryness.
Step 3: Evaluate Existing Condition and Finish
Inspect systematically:
– Finish Types: Polished (mirror-like), honed (smooth matte), brushed (lightly textured), flamed (rough), leathered (undulating). Texture affects sealer uptake and maintenance.
– Existing Issues: Use low-angle lighting to reveal hairline cracks, etching (dull spots near sinks), stains, or spalling (surface flaking). Note grout condition—often more porous than stone.
– Previous Treatments: Rub a hidden area with acetone on a white cloth. Yellowish residue suggests old sealer requiring removal before reapplication.
Analogy: Assessment parallels medical diagnosis. Sealing over unresolved etching or residue is like bandaging an uncleaned wound—the underlying issue worsens. Document findings with notes or photos to track changes over time.
Step 4: Analyze Environmental Stressors
Context shapes maintenance intensity:
– Indoor vs. Outdoor: Outdoor stone faces UV exposure, thermal cycling, moisture, and pollutants. Indoor stone contends with spills, foot traffic, and cleaning chemicals.
– Location Factors:
– Coastal: Salt spray accelerates erosion; requires salt-resistant sealers and regular freshwater rinsing.
– Freeze-thaw climates: Breathable sealers are essential to allow vapor escape and prevent spalling.
– High-traffic zones: Prioritize abrasion-resistant sealers; use walk-off mats.
– Wet areas (showers, pool decks): Focus on mold resistance and slip safety; inspect grout lines closely.
– Sun-exposed areas: UV-stable sealers protect against degradation; light-colored stones reflect heat more effectively.
Consideration: A patio in a shaded garden requires different care than one under direct sun. Adapt strategies to your specific micro-environment.
Pillar 2: Protection – Strategic Sealing for Maximum Defense
Sealing buys time—it slows liquid absorption, allowing minutes (not seconds) to address spills. It does not make stone “invincible” or prevent surface reactions like etching. The right sealer enhances natural beauty without altering texture, slip resistance, or breathability.
Step 1: Choose the Optimal Sealer Type
Three primary categories exist:
| Sealer Type | Mechanism | Best Applications | Key Considerations |
|---|---|---|---|
| Impregnating (Penetrating) | Fills pores below surface with repellent molecules (silanes, siloxanes). | Most natural stones; outdoor areas; high-traffic zones; wet locations. | Does not prevent etching; preserves natural look and slip resistance; requires reapplication. |
| Coating (Film-Forming) | Forms visible layer on surface (acrylics, epoxies). | Non-porous surfaces (concrete, some manufactured stone); low-traffic decorative walls. | Can yellow, peel, or become slippery; traps moisture; generally not recommended for natural stone. |
| Enhancer | Impregnating formula with color-deepening agents (“wet look”). | Unpolished stones (flagstone, slate, travertine) where aesthetic enhancement is desired. | May darken light stones; test thoroughly; can affect slip resistance. |
Industry Context: Conservation practices for historic stone structures consistently favor breathable impregnating sealers for their reversibility and minimal visual impact. Film-forming sealers are rarely used on natural stone in professional preservation due to moisture-trapping risks.
Adaptive Selection Guidance:
– Budget-Conscious: Water-based impregnators offer effective short-term protection for low-risk indoor surfaces (e.g., bathroom vanities). Reapply more frequently.
– High-Exposure Areas: Solvent-based or hybrid impregnators (silane/siloxane blends) provide deeper penetration and longer-lasting defense for kitchens, exteriors, or high-value surfaces. Verify product data sheets for vapor transmission rates (VTR) in freeze-thaw zones.
– Critical Criteria:
– Oil Repellency: For kitchens, select sealers explicitly rated for oil resistance.
– Breathability: Essential outdoors; higher VTR allows moisture vapor to escape.
– Slip Safety: For wet areas, choose sealers labeled “non-slip” or compatible with anti-slip additives.
– Indoor Air Quality: Look for low-VOC formulations with recognized eco-certifications.
Step 2: Master Surface Preparation
Sealer performance depends overwhelmingly on preparation:
1. Clean Thoroughly: Use pH-neutral stone cleaner. For outdoor surfaces, low-pressure rinsing (<1500 PSI) is acceptable; avoid acid-based cleaners on calcareous stones.
2. Repair First: Address cracks with stone-compatible epoxy; remove light etching with appropriate polishing compounds before sealing.
3. Ensure Complete Dryness: Wait 48–72 hours after cleaning. In humid conditions, use fans or dehumidifiers. Residual moisture causes hazing or failure.
4. Test First: Apply sealer to a hidden area. Check after 24 hours for discoloration, residue, or texture changes. Allow full cure (7 days) before final evaluation.
Why This Step is Crucial: Residues from cleaners, waxes, or old sealers create barriers that prevent proper absorption. Patience during drying prevents costly remediation later.
Step 3: Apply with Precision Technique
Method matters more than brand:
– Tools: Lint-free microfiber cloths, natural sea sponges, or low-pressure sprayers. Avoid rollers (fiber shedding) or stiff brushes (streaking).
– Process:
1. Work in small sections (approx. 2×2 ft / 0.6×0.6 m).
2. Apply liberally until surface is saturated.
3. Wait per product instructions (typically 3–10 minutes) for absorption. Reapply to dry spots.
4. Before sealer dries to a haze (usually 5–15 minutes), buff off all excess with clean, dry microfiber cloths.
5. Overlap sections slightly.
– Conditions: Apply between 50–90°F (10–32°C), low humidity, no rain expected for 24–72 hours. Avoid direct sun or wind. Early morning on a cloudy day is often ideal.
– Coats: Most stones require 1–2 coats. Apply second coat only while first is absorbed but not fully cured (typically within 1 hour).
Textured Surfaces Tip: For flamed granite or deeply pitted travertine, gently work sealer into crevices with a soft brush after initial application, then buff excess. For tile installations, pre-seal grout lines with a small brush—they absorb sealer faster than stone.
Step 4: Validate and Cure
Protection completes only after curing and verification:
– Cure Time: 24 hours for light foot traffic; 72 hours before water exposure; 7–14 days for full chemical resistance (critical for countertops). Avoid spills, furniture placement, or cleaning during this period.
– Validation Test: After full cure (7 days), repeat the water drop test. Properly sealed stone beads water for 10+ minutes without darkening. For kitchen surfaces, test with olive oil.
– Documentation: Record sealer type, application date, coverage area, and test results. Set calendar reminders for future reassessment. This log supports consistent care and adds value during property transitions.
The Fundamental Principle: Sealing is an investment in response time—not invulnerability. Its value lies in granting minutes to address spills, not in eliminating vigilance.
Pillar 3: Maintenance – The Daily Rituals That Prevent Catastrophe
Consistent, gentle care sustains protection far longer than any single sealing event. This pillar transforms maintenance from anxiety into manageable habit.
Step 1: Establish a Cleaning Protocol
Daily/Weekly Routine:
– Dry Dusting: Use soft microfiber cloths or mops to remove abrasive grit. Place high-quality walk-off mats (minimum 6 ft / 1.8 m) at all exterior entrances.
– Damp Cleaning: Use pH-neutral stone soap diluted in warm water. Wring mops thoroughly; change water frequently. Spray cleaner on cloth, not directly on stone.
– Spill Response: Blot immediately with absorbent cloth. For sticky residues, soften with damp cloth before gentle wiping.
Monthly Deep Clean:
– Floors: Stone-specific cleaner with mild surfactants. Avoid steam mops—their heat and moisture can degrade sealers over time.
– Countertops: Address hard water deposits with baking soda paste; rinse immediately.
– Outdoor Stone: Sweep regularly; rinse with hose. For organic growth, use oxygen bleach solution (1:10 ratio), wait 15 minutes, gently scrub, rinse thoroughly. Never use chlorine bleach.
Critical “Avoid” List:
– ❌ Acidic cleaners (vinegar, lemon juice, CLR) on marble, limestone, travertine, or onyx—causes etching.
– ❌ Abrasive pads, powders, or steel wool—scratches surfaces permanently.
– ❌ Ammonia or bleach-based cleaners—degrades sealers and discolors stone.
– ❌ Undiluted cleaners or generic “all-purpose” formulas—always verify pH (7–8.5 is ideal for stone).
Analogy: Using vinegar on marble is like sanding fine wood—it removes the surface layer. Gentle, pH-appropriate cleaning preserves integrity.
Step 2: Implement Proactive Protection Habits
Small consistent actions prevent most damage:
– Kitchens: Always use cutting boards, coasters, and trivets. Store acidic liquids (vinegar, citrus) in cabinets.
– Bathrooms: Squeegee shower walls after use; run exhaust fan during and after showers; use liquid soap to reduce scum.
– Outdoors: Sweep weekly to prevent organic staining; rinse after salt exposure or pool use; trim overhanging foliage.
– Furniture/Footwear: Attach felt pads to furniture legs; encourage removal of gritty footwear indoors.
– Seasonal Adjustments:
– Winter: Avoid chloride-based de-icers on stone walkways; use magnesium chloride or sand. Shovel gently with plastic blades. Seal cracks before first freeze.
– Summer: Rinse outdoor stone after pool use; provide shade for light-colored stones in intense sun; check irrigation alignment.
– Rainy Seasons: Ensure drainage around patios; clean gutters to prevent overflow onto stone.
Documented Insight: Properties using walk-off mats and furniture pads consistently show reduced wear in high-traffic zones over multi-year periods. Prevention compounds value.
Step 3: Schedule Reassessment and Re-Sealing
Sealers degrade gradually. Build a personalized rhythm:
– High-Risk Areas (kitchen counters, shower floors, entryways): Test sealant every 6 months; reseal every 1–2 years.
– Medium-Risk (bathroom vanities, indoor floors): Test annually; reseal every 2–4 years.
– Low-Risk (decorative walls, backsplashes): Test every 2 years; reseal every 3–5 years.
– Outdoor Stone: Test every 6 months in harsh climates (coastal, freeze-thaw, high UV); reseal every 1–3 years.
How to Test: Water drop test in multiple locations, including high-wear zones. If water darkens stone within 5 minutes, reseal. For kitchen surfaces, also test with oil. Maintain a simple log of dates and observations.
Targeted Strategy: Focus resealing efforts on high-exposure zones first (e.g., area around kitchen sink). This extends overall protection and conserves resources.
Signs It’s Time: Water absorbs quickly; stone appears dull after cleaning; stains occur more readily; visible wear patterns emerge.
Step 4: Address Issues Immediately—Before They Escalate
Prompt, appropriate action prevents minor issues from worsening:
– Stains: Identify type first (oil, organic, rust). Apply a poultice (absorbent powder like kaolin clay + activating liquid) covered with plastic. Wait 24–48 hours. Never scrub—this drives stain deeper. Start with water-based poultice for unknown stains.
– Etching: Light etching on polished marble may respond to marble polishing powder. Deep etching requires professional assessment. Prevention—immediate spill cleanup—is paramount.
– Mold/Mildew: Paste of baking soda and hydrogen peroxide (3%); apply, wait 15 minutes, gently scrub with soft brush, rinse. Improve ventilation to prevent recurrence.
– Efflorescence (white powder on outdoor stone): Brush off dry with nylon brush. If persistent, use efflorescence remover per instructions. Address underlying moisture sources.
– Spalling/Flaking: Indicates trapped moisture. Discontinue use and consult a stone restoration professional. DIY attempts often worsen damage.
Spill Response Protocol:
1. Blot (don’t wipe) liquid spills immediately.
2. For oil-based spills, cover with cornstarch or baking soda to absorb; wait 15 minutes, then brush off.
3. For acidic spills on calcareous stone, neutralize after blotting with baking soda paste; rinse gently.
4. When uncertain, blot with water-dampened cloth first.
Navigating Complex Scenarios: When Standard Advice Falls Short
Real-world situations often require nuanced judgment. This section addresses high-friction contexts with adaptable strategies.
The “Unsealable” Stone Consideration
Some stones exhibit very low porosity (certain dense granites, polished quartzite). If water beads persistently with no darkening after 30 minutes:
– Confirm: Test with mineral oil. If it also beads without absorption, sealing may provide negligible benefit.
– Alternative Strategy: Focus on surface protection habits—coasters, trivets, immediate spill cleanup. For etch-prone stones like marble, consider a honed (matte) finish, which masks light etching better than polished surfaces.
– Philosophical Note: Many historic marble surfaces (museum pieces, heritage architecture) are maintained without sealing, valued for their evolving patina. For low-traffic decorative surfaces, accepting natural aging can be a valid choice.
– Advanced Options: Nano-coating technologies exist but require professional application, significant investment, and periodic renewal. Consult a qualified restoration specialist for high-value surfaces.
Reviving Neglected or Damaged Stone
Stone with deep stains, failed sealers, or surface damage requires staged rehabilitation:
1. Document and Assess: Photograph condition. Identify stone type definitively. Note all issues (stain types, etching depth, residue).
2. Strip Old Sealers: Use a stone-safe stripper appropriate for sealer type (alkaline for water-based, solvent-based for solvent sealers). Apply per instructions, cover with plastic to prevent evaporation, wait recommended time, gently scrub with nylon brush, rinse thoroughly. Always test stripper in hidden area first. Neutralize if required.
3. Deep Clean: After stripping and 72-hour drying period, address stains:
– Organic stains: Oxygen bleach poultice
– Oil stains: Mineral spirits poultice (test first)
– Rust stains: Commercial rust remover poultice (use cautiously)
Apply poultice, cover, wait 24–48 hours, remove residue, rinse. Repeat if needed.
4. Repair Surface: Fill cracks with color-matched epoxy. Light etching on polished stone may respond to polishing powder; deep damage requires professional honing.
5. Reassess and Seal: Only after stone is pristine, dry, and repairs cured. Perform absorption test. Apply sealer meticulously.
Critical Caution: Aggressive DIY methods (undiluted acids, harsh solvents) often cause irreversible damage. For extensive damage, large areas, or valuable/historic stone, professional restoration is typically more cost-effective than replacement. Patience and proper technique yield superior results.
Climate-Adaptive Strategies
Environmental factors demand tailored approaches:
– Humid/Tropical Climates: Prioritize sealers with mold inhibitors. Ensure sub-surfaces have moisture barriers. Increase ventilation indoors. Rinse outdoor stone regularly to remove salt or pollutants. Reseal outdoor surfaces more frequently. Dense stones (granite, quartzite) often perform better than porous options.
– Arid/Sunny Climates: Choose UV-stable sealers (siloxane-based). Rinse monthly to remove abrasive dust. Light-colored stones reflect heat better. Seal cracks promptly to prevent wind-driven debris infiltration. Apply sealers during moderate temperatures for optimal curing.
– Cold/Freeze-Thaw Climates: Breathable sealers with high vapor transmission rates are essential. Seal all cracks before winter. Avoid chloride-based de-icers; use magnesium chloride or sand. Shovel with plastic blades. Textured finishes (flamed, bush-hammered) provide inherent slip resistance.
– Coastal Zones: Select sealers explicitly rated for salt resistance. Rinse stone weekly with fresh water. Dense, salt-tolerant stones (granite, slate) are preferable for exposed areas. Install vegetation barriers to reduce direct salt spray. Inspect grout lines annually.
DIY vs. Professional: Making an Informed Choice
Consider DIY When:
– Surface is small, accessible, and low-risk (backsplash, vanity top).
– Stone type and condition are confirmed through testing.
– You have time for meticulous preparation, application, and curing.
– Weather conditions are controllable and ideal.
– You’ve successfully completed similar projects.
Seek Professional Help When:
– Surface is large (>200 sq. ft), complex (curved, multi-material), or high-value.
– Previous sealing attempts failed (hazing, peeling).
– Stone has significant existing damage requiring repair.
– Specialized equipment or expertise is needed (moisture meters, industrial polishers).
– Project involves safety-critical areas (steep stairs, pool decks requiring non-slip treatment).
– Time constraints or weather uncertainty exist.
Decision Support:
– Cost Context: Professional sealing typically reflects regional labor rates and project complexity. For high-value surfaces, professional application represents prudent risk management.
– Finding Qualified Help: Look for certifications from recognized industry bodies (Marble Institute of America, International Stone Institute). Request project portfolios and written scope details. Verify insurance coverage.
– Red Flags: Uncertainty about stone type, visible unresolved damage, adverse weather forecasts, or feeling rushed. When in doubt, consult a professional for assessment—even if proceeding DIY.
Your Questions, Answered
Q: How do I know if my stone is already sealed?
A: Perform the water drop test on clean, dry stone in multiple locations (including high-use areas). Wait 10–15 minutes. If water beads prominently with no darkening underneath, protection is likely intact. If water absorbs and leaves a dark spot within 5 minutes, sealing is compromised or absent. Test annually as part of routine maintenance. For valuable surfaces, professionals can provide precise assessment.
Q: Can I seal stone myself, or do I need a professional?
A: Many homeowners successfully seal stone with careful preparation and attention to detail. Start with a small, inconspicuous test area. However, for large projects, valuable surfaces, complex conditions, or when uncertainty exists, consulting a certified stone care professional reduces risk. Certifications from industry organizations indicate verified expertise. When in doubt, a professional assessment provides valuable guidance.
Q: What’s the difference between sealing and polishing stone?
A: Sealing is a chemical treatment that penetrates pores to repel liquids without altering appearance (when using impregnating sealers). Polishing is a mechanical process using abrasives to refine surface texture and create shine. They address different needs: polishing corrects surface finish; sealing provides stain resistance. Address any needed polishing before sealing. Polishing requires specialized equipment and skill; sealing is generally accessible to careful DIYers.
Q: Will sealing prevent etching on marble countertops?
A: No. Etching is a chemical reaction between acid (citrus, vinegar, wine) and calcium carbonate in marble, limestone, or travertine—it affects the surface itself, not just pores. Sealers slow liquid absorption but do not block acid contact. Prevention relies on behavior: immediate spill cleanup, using coasters, avoiding direct contact with acidic substances, and considering a honed finish which masks light etching better. Accepting subtle patina as part of marble’s character is common among enthusiasts. For zero-etch surfaces, consider granite, quartzite, or engineered quartz.
Q: How often should I reseal my stone surfaces?
A: Frequency depends on stone type, sealer quality, location, and usage—not calendar dates. Test high-traffic areas every 6 months; moderate areas annually; low-traffic areas every 2 years; outdoor stone in harsh climates every 6 months. Always validate with the water drop test. A dense granite countertop with premium sealer may last 5+ years; a travertine shower floor may need annual attention. Document your tests to establish a personalized rhythm.
Q: Are there eco-friendly or non-toxic sealers available?
A: Yes. Water-based impregnating sealers typically have lower VOC content than solvent-based options. Look for products with recognized eco-certifications and low-VOC formulations. Note: “Natural” DIY mixtures (linseed oil, beeswax, vinegar) are not recommended—they can yellow, attract dirt, provide inferior protection, and are difficult to remove. Modern water-based synthetics offer effective protection with reduced environmental impact. Ensure adequate ventilation during application regardless of product type.
Q: Can I use the same sealer for indoor and outdoor stone?
A: Generally not advisable. Outdoor sealers must withstand UV exposure, temperature extremes, moisture cycles, and require enhanced breathability. Indoor sealers focus on stain resistance and may include additives unsuitable for weather exposure. Always verify the product label specifies suitability for your intended environment. Using an indoor sealer outdoors typically leads to premature failure (yellowing, peeling). For transitional areas (covered patios), select sealers explicitly rated for both environments.
Q: What should I do if I accidentally used vinegar to clean my marble countertop?
A: Act promptly but calmly: 1) Blot the area dry immediately. 2) Rinse thoroughly with clean water and pH-neutral stone cleaner. 3) Assess: light etching appears as a dull spot. For minor etching on polished marble, a marble polishing powder designed for polished finishes may help—follow product instructions carefully. For deep etching or uncertainty, consult a stone restoration professional. Most importantly, keep a dedicated stone-safe cleaner accessible to prevent recurrence. This is a common learning moment; focus on future prevention.
Q: Does sealing make stone slippery?
A: Properly applied impregnating sealers (recommended for most stone) work below the surface and do not alter texture or slip resistance. However, coating-type sealers (film-formers like acrylics) can create slippery surfaces, especially when wet. For pool decks, showers, or entryways, always select sealers labeled “non-slip,” “breathable impregnator,” or “for wet areas.” Some professionals incorporate anti-slip additives during application for critical zones. Test slip resistance on a sample area after curing. Never use glossy film-formers where safety is a concern.
Q: How do I remove a white haze left by sealer?
A: Haze usually indicates excess sealer dried on the surface. First attempt: buff vigorously with a clean, dry microfiber cloth. If persistent: apply a small amount of the same sealer to re-liquefy residue, then immediately buff off thoroughly. For stubborn cases: use a sealer stripper designed for the sealer type, following instructions precisely—test in hidden area first. Prevention is key: always buff off all excess sealer before it begins to dry (within 5–15 minutes), and ensure surface is impeccably clean and dry before starting.
Q: Is it safe to seal stone around a fireplace or wood stove?
A: Exercise caution. Standard sealers may discolor or degrade under sustained high heat. For stone within 12 inches of heat sources, consult the sealer manufacturer about heat resistance specifications. For areas subject to direct radiant heat or sparks, sealing may not be recommended; focus on gentle cleaning and accepting natural aging. Never use flammable solvent-based sealers near ignition sources. For hearths, consider heat-resistant masonry treatments applied by professionals. Prioritize safety over appearance near heat.
Q: How do I maintain sealed stone grout lines?
A: Grout is often more porous than stone and requires focused attention. During initial sealing, apply sealer directly to grout lines with a small brush before sealing the stone. For maintenance: clean regularly with stone-safe grout cleaner and soft brush; avoid acidic cleaners. Re-seal grout lines annually or when water no longer beads on them. For stained grout, use oxygen bleach poultices (never chlorine bleach). In high-traffic wet areas, some professionals recommend sealing grout lines twice during initial application for enhanced protection.
Conclusion and Your Next Step
Stone carries geological time within its structure—a connection to ancient landscapes and human craftsmanship. Caring for it thoughtfully is not about achieving sterile perfection, but about honoring its journey while ensuring it remains functional and beautiful for years to come. The Preservation Triad—Assess, Protect, Maintain—provides a reliable compass: transforming complexity into clear, actionable steps grounded in material understanding.
Recall the three foundational practices:
1. Know your stone through identification, porosity testing, and environmental awareness.
2. Protect with precision using appropriate sealers applied with meticulous preparation.
3. Maintain consistently through gentle cleaning habits and proactive reassessment.
This approach cultivates mindfulness—a small daily act of respect for natural materials in a disposable world. Each careful wipe, each timely resealing, affirms a choice for longevity and legacy.
The 24-Hour Rule
Within the next day, select one stone surface in your home—the kitchen countertop, bathroom vanity, or a patio step. Perform the water drop test: place three drops of water, set a timer for 15 minutes, and observe without judgment. Document what you see with a note or photo. This simple act transforms knowledge into personal insight, revealing your stone’s current state. No purchase required—just curiosity. This tiny step initiates a sustainable practice of attentive stewardship.
The Big Picture
Thoughtful stone care connects us to a continuum of craftsmanship—from cathedral builders selecting enduring limestone to modern homeowners choosing mindful maintenance. Your granite countertop holds minerals formed deep within the earth; your limestone floor may contain fossils millions of years old. By applying these principles, you ensure these surfaces age with grace and character, becoming heirlooms imbued with memory and meaning. They stand ready to welcome future generations with the same quiet dignity they offer today—not as flawless artifacts, but as cherished elements of a lived-in home.
Explore Our Complete Stone Care System:
Understanding Stone Types: A Visual Identification Guide | Gentle Cleaning Methods for Every Stone Surface | Repairing Common Stone Damage: When to Seek Help | Seasonal Stone Care Calendar for Your Climate Zone | Natural vs. Engineered Stone: Making an Informed Choice | Evaluating Stone Care Products: What Certifications Matter | Creating a Sustainable Stone Maintenance Routine