Transform clutter into calm with strategic storage solutions that keep every necessity within reach yet out of sight—tested methods for vanities, showers, corners, and overlooked spaces most guides overlook.
Imagine stepping into your bathroom each morning to a space that feels like a serene retreat—not a landscape of scattered toothbrushes, tangled cords, and half-empty product bottles. The difference isn’t square footage or a major renovation. It’s intentionality. True bathroom harmony emerges not from adding storage, but from strategically concealing what you use daily while preserving effortless access. This guide dismantles the myth that “hidden” means “inconvenient,” revealing a systematic approach to tucking away toiletries, cleaning supplies, medications, and daily essentials so seamlessly they vanish from sight yet remain intuitively available. You’ll discover how to engineer calm into every inch of your space—renter-friendly, budget-conscious, and designed for how you actually live.
Introduction: Why Visibility Shapes Perception (And How to Rewire Your Space)
Walk into any thoughtfully designed bathroom. Notice the absence of visual noise? No stray cotton swabs, no towering shampoo bottles, no tangled cords draped over faucets. This isn’t accidental minimalism—it’s deliberate invisibility. Environmental psychology research suggests that visible clutter can contribute to cognitive load and diminish a space’s restorative potential. In the bathroom—a sanctuary meant for care and transition—managing visual stimuli supports its purpose. Yet most storage advice focuses on adding shelves, baskets, or cabinets, inadvertently amplifying visual complexity. The breakthrough lies in shifting perspective: storage isn’t about containing items; it’s about managing perception.
When we speak of “hiding necessities,” we aren’t advocating for impractical secrecy. We mean contextual concealment: placing items where their presence serves function without demanding attention. A spare roll of toilet paper tucked inside a woven basket beneath the sink isn’t “hidden” in a frustrating way—it’s resolved. Its location solves a need (accessibility) while eliminating a visual trigger (the stark white cylinder against tile). This philosophy transforms storage from a logistical chore into a design strategy. Feedback from homeowners consistently indicates that thoughtfully concealed storage contributes to a greater sense of calm and satisfaction with the space. The goal isn’t emptiness—it’s intentionality. Every solution in this guide operates on this core truth: what you don’t see, you don’t stress about. Let’s rebuild your bathroom around that principle.
The Zone Defense Framework: Mapping Your Bathroom’s Hidden Potential
Forget fragmented “add a shelf” advice. True invisibility requires a spatial audit—a methodical scan of your bathroom’s anatomy to identify underutilized zones where concealment lives. We call this the Zone Defense Framework, a seven-zone system used by professional organizers to maximize utility without visual penalty. Unlike isolated tips found online, this framework treats your bathroom as an interconnected ecosystem. Master one zone, and you’ll instinctively spot opportunities in others. Each zone targets specific item categories with tailored concealment tactics, ensuring no necessity remains stranded in plain sight.
The Fundamental Principle: Clutter is not defined by quantity of items, but by the visibility of unresolved objects. Control visibility through contextual placement, and you shape the emotional experience of the space.
Zone 1: The Vanity Interior – Beyond the Black Hole
Your vanity holds profound concealment potential—and common frustration. Most people treat it as a catch-all: shove items inside, slam the door, and hope for the best. Transformation begins with internal architecture.
Why this zone matters: Vanities often feature deep interiors that go underutilized. The goal: convert depth into organized accessibility through intentional zoning.
Step-by-Step Concealment System:
1. Empty and categorize: Remove everything. Group items by frequency: Daily (toothpaste, floss), Weekly (face masks, razors), Occasional (travel kits), Emergency (first-aid items).
2. Install vertical dividers: Use adjustable acrylic organizers to create “rooms” within drawers. Place daily items in the front third of the top drawer; weekly items behind them. Critical nuance: Angle dividers diagonally in corner vanities to eliminate dead space.
3. Leverage door interiors: Adhere slim magnetic strips inside the vanity door to hold bobby pins, tweezers, or nail files. For deeper cabinets, mount an over-the-door organizer with clear pockets—ideal for hair ties or cotton pads.
4. Create a “landing zone”: Dedicate the very back of the bottom shelf for a lidded bin labeled “To Process.” Toss stray samples or orphaned items here weekly. Prevents drawer drift.
Common pitfalls to avoid:
– Overstuffing drawers: If you can’t close a drawer smoothly, you’ve exceeded capacity. Remove a few items immediately.
– Ignoring height: Stackable bins utilize vertical space. Place taller items (hairdryer) in back, shorter items (lip balm) in front.
– Forgetting ergonomics: Store heavy items on lower shelves. Light items higher. Reduces strain during retrieval.
Budget spectrum solutions:
– Ideal: Custom pull-out trays with soft-close hinges. Maximizes every inch; items glide forward.
– Budget: Repurpose sturdy cardboard boxes wrapped in contact paper. Cut to fit drawer dimensions. Free and fully customizable.
– Emergency: Use empty tissue boxes covered in decorative paper to corral small items. Instant compartmentalization.
Practical example: Using affordable bins, one homeowner created dedicated zones for daily skincare in the front of a drawer and weekly tools behind them, with a magnetic strip inside the door for metal tools. The result: less time searching, more calm closing the drawer.
Zone 2: The Shower & Tub Sanctuary – Water-Resistant Invisibility
Shower caddies dangling from showerheads often feel temporary. True concealment integrates storage into the architecture—not hanging it on it. Moisture resistance is essential; solutions must withstand humidity without degradation.
Material intelligence matters:
– Avoid: Unsealed wood (warps), untreated fabric (molds), standard metal (rusts).
– Choose: Powder-coated steel, marine-grade teak (naturally resistant), acrylic, or stainless steel.
– Pro insight: Nano-coated surfaces can help reduce soap scum buildup, simplifying maintenance.
Architectural integration tactics:
– Recessed niches: The gold standard. During tile installation, frame a cavity between studs (minimum 3.5″ deep). Line with waterproof membrane. Renter alternative: Use adhesive-mounted acrylic niches that bond securely to tile without drilling. Test adhesion after 72 hours before loading.
– Corner caddies with purpose: Opt for triangular shelves that sit flush in corners. Place shampoo/conditioner on lower tiers, daily face wash on middle. Key detail: Ensure drainage holes are adequately sized to prevent puddling.
– Magnetic magic: Mount stainless steel strips on shower walls (using waterproof adhesive). Pair with magnetic containers for razors or tweezers. Items stay secure yet lift off effortlessly.
– Tub deck concealment: For freestanding tubs, use a tailored skirted storage bench. Slide baskets underneath for bath salts or toys. Choose water-resistant fabric.
Product placement psychology:
Arrange items by usage sequence: cleanser → exfoliant → moisturizer. Place frequently used items at elbow height (36–48″ from floor). Store backup bottles behind current ones—when the front bottle empties, the backup slides forward. This “first-in, first-out” system prevents forgotten expired products.
Troubleshooting real friction:
– Problem: “My shower has no flat surfaces.”
Solution: Install a tension rod horizontally 6″ below the showerhead. Hang a single-pocket mesh organizer for washcloths.
– Problem: “Kids leave toys everywhere.”
Solution: Mount a suction-cup caddy with large compartments outside the shower spray zone. Establish a clear “home” for toys.
– Problem: “Hard water stains everything.”
Solution: Choose matte-finish containers—they hide mineral deposits better than glossy surfaces. Wipe weekly with vinegar solution.
Note: Materials exposed to constant moisture require periodic inspection. Replace components showing wear to maintain both function and appearance.
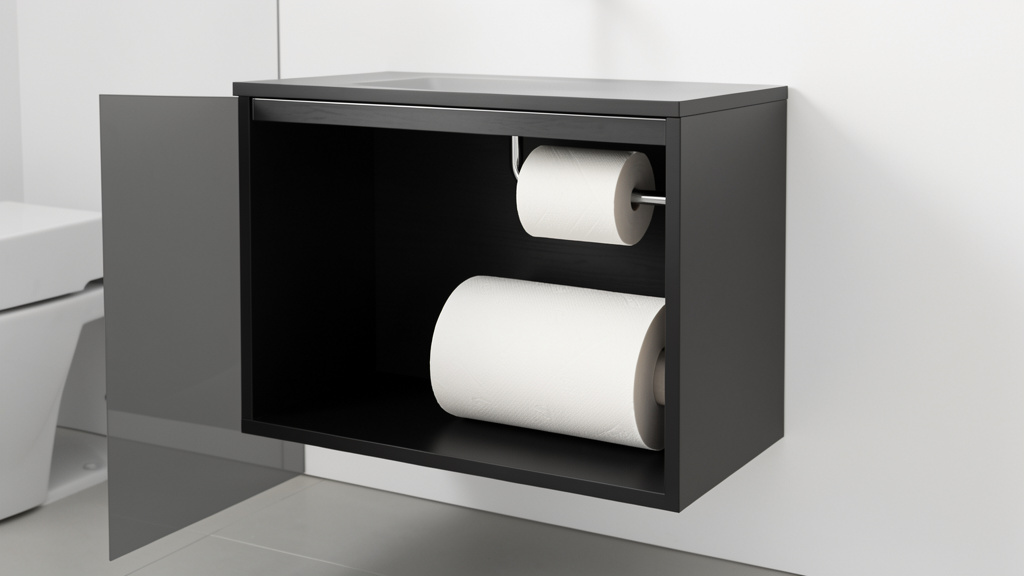
Zone 3: The Toilet Territory – Dignity in the Details
The space around your toilet is valuable real estate often underutilized. Elevate this area with purposeful concealment that serves function without visual intrusion.
Three-tiered concealment strategy:
1. Above: Install a slim floating shelf (max 8″ deep) 12″ above the tank. Use it for decorative concealment: a small woven basket holds spare rolls; a ceramic vase hides toilet brushes. Critical measurement: Ensure shelf clearance allows tank lid removal.
2. Beside: Tuck a narrow cabinet (10–12″ wide) beside the toilet. Ideal for cleaning supplies. Choose one with soft-close doors and interior hooks. Pro tip: Line shelves with peel-and-stick vinyl—it’s waterproof and cushions bottles.
3. Beneath: Place a low-profile lidded bin beside the base. Store extra toilet paper, air freshener refills, or pet waste bags. The lid hides contents while blending with decor.
Renter-friendly innovation:
Use tension rods creatively. Install one vertically beside the toilet tank. Hang a narrow fabric pocket organizer to hold toilet paper rolls or cleaning wipes. No holes, fully removable. For stability, choose rods with rubberized ends.
Aesthetic integration considerations:
– Match finishes to existing hardware where possible.
– Choose containers in neutral textures: rattan, linen, matte ceramic. Avoid bright plastics.
– Keep visible items minimal: one decorative object on the shelf maintains calm.
Why this works: This zone handles “transition items”—things used briefly but frequently. By giving them a dedicated, concealed home, you eliminate common eyesores. A sealed vintage crate beside the toilet can hold essentials while adding character.
Zone 4: The Wall & Corner Alchemy – Vertical Real Estate Unleashed
Walls aren’t just boundaries—they’re untapped storage landscapes. True invisibility uses walls strategically, placing concealment exactly where motion occurs.
Motion-mapping your walls:
Stand in your bathroom. Trace your routine with your eyes:
– Toothbrushing path: From sink to mirror.
– Shaving path: From cabinet to sink edge.
– Post-shower path: From tub to towel hook.
Install concealment along these paths:
– Mirror-integrated storage: Choose a medicine cabinet with recessed depth (3–4″). Store daily-use items inside: toothpaste, floss, contact solution. The mirror door hides contents while reflecting light. Installation note: Ensure cabinet depth doesn’t interfere with light fixtures.
– Floating ledges with intent: Mount a single narrow ledge (4–6″ deep) beside the sink. Place a small lidded ceramic jar for cotton swabs. The lid maintains invisibility; the ledge keeps items within arm’s reach. Avoid multiple ledges—they create visual clutter.
– Corner carousels: In tight corners, install a rotating acrylic carousel. Store backup shampoo or hair tools. Spin to access; contents stay contained. Ideal for awkward angles.
– Magnetic strips for metal tools: Mount a stainless steel strip beside the mirror. Hold tweezers, nail scissors, bobby pins. They’re visible yet organized—a curated display versus chaotic scattering.
Material harmony guide:
| Location | Recommended Materials | Rationale |
|——————-|—————————–|——————————————–|
| Near sink/mirror | Acrylic, powder-coated metal | Resists splashes; clean aesthetic |
| Shower-adjacent | Marine teak, stainless steel | Withstands humidity; durable |
| Low-traffic wall | Sealed wood | Adds warmth; requires moisture protection |
Critical installation considerations:
– Anchor properly: For shelves holding >5 lbs, hit wall studs. Use appropriate anchors in drywall.
– Mind the sightline: Install shelves at least 18″ above countertops to avoid visual crowding.
– Lighting synergy: Place LED strip lights under floating shelves. Illuminates contents without glare; aids nighttime retrieval.
Real friction solved: “My walls are concrete.” Use heavy-duty adhesive hooks rated for your item’s weight. Test with weight for 48 hours before committing. For corners, adhesive-mounted acrylic carousels work reliably on smooth surfaces.
Zone 5: The Over-Door & Vertical Frontier – Forgotten Inches, Maximum Impact
Doors represent significant unused vertical space. Elevate this zone with precision-engineered solutions that feel intentional.
Door-specific strategies:
– Exterior (outside bathroom door): Mount a slim pocket organizer for items used before entering: hairbrush, perfume. Keeps morning routine streamlined. Choose fabric with reinforced stitching.
– Interior (inside bathroom door): Install a clear-pocket organizer only for items needing quick visual ID: contact lens case, daily medication. Limit pockets to avoid visual chaos.
– Shower door alternative: For frameless glass shower doors, use suction-cup organizers with locking mechanisms. Test suction weekly; replace cups if seal weakens.
Vertical expansion beyond doors:
– Tension rod zones: Install horizontal tension rods at varying heights:
– High rod (72″ from floor): Hang lightweight baskets for extra towels.
– Mid rod (48″): Drape robes or drying delicates.
– Low rod (18″): Create a “landing strip” for shoes or bath mats to air-dry.
– Pegboard power: Mount a small section of powder-coated pegboard beside the sink. Use hooks to hang hair tools. Game-changer: Add a small shelf above for cord wrap. Keeps cords contained and heat-safe.
Why tension rods work well here:
They’re adjustable, removable, and create “floating” storage that doesn’t visually anchor the space. In compact bathrooms, staggered rods with baskets or robes can feel airy rather than crowded.
Safety considerations:
– Avoid hanging heavy items on over-door organizers.
– Ensure door clearance: Measure swing radius before installing.
– For glass doors, verify organizer weight limit with a safety margin.
Zone 6: The Under-Sink Abyss – Taming the Black Hole
Dark, damp, and disorganized—the under-sink zone challenges many. Yet with systematic organization, it becomes a powerhouse for concealing bulk items: backup toiletries, cleaning supplies, plumbing tools.
The 4-Step Under-Sink Rescue Protocol:
1. Empty and clean: Remove everything. Wipe interior. Check for leaks under pipes—address immediately to prevent moisture issues.
2. Map the terrain: Sketch the space, noting pipe locations. Measure usable width/depth/height. Pro tip: Take a photo with a ruler beside pipes for reference.
3. Customize the container:
– For single sink: Use a U-shaped organizer that wraps around pipes.
– For double sink: Install slide-out trays on both sides. Store cleaning supplies on one side, backups on the other.
– Renter solution: Repurpose sturdy cardboard boxes wrapped in contact paper. Cut notches for pipes.
4. Categorize with containers:
– Front row: Daily-use items (surface cleaner, sponge).
– Middle row: Weekly items (glass cleaner, extra brushes).
– Back row: Bulk backups (toilet paper, shampoo refills).
– Pipe zone: Hang small mesh bags from pipes for sponges.
Moisture mitigation essentials:
– Place silica gel packs inside containers to absorb humidity. Replace monthly.
– Line shelves with vinyl flooring remnants—waterproof and easy to wipe.
– Store liquid items in secondary containment (small plastic bins) to contain leaks.
Product spotlight: Slide-out trays
These transform inaccessible depth into accessible real estate. Pull the tray forward; everything is visible. Push back; contents vanish. Look for trays with smooth glides and non-slip lining.
Budget alternative: Repurpose old baking sheets as DIY trays. Line with non-slip matting.
Practical transformation: Using repurposed containers lined with waterproof material and silica gel packs, one homeowner turned a leak-prone under-sink area into an organized zone where the plunger is instantly accessible.
Zone 7: The Hidden Nooks – Architectural Secrets Most Miss
Every bathroom has secret pockets of space waiting for purpose. These micro-zones require observation—but yield disproportionate rewards in concealment.
Scout these overlooked spots:
– Above the door frame: Install a shallow shelf (4″ deep) across the top of the bathroom door frame. Store infrequently used items: extra lightbulbs, travel kits. Installation: Use lightweight materials and secure properly.
– Between wall and vanity: In some layouts, gaps exist beside vanities. Slide a slim cart into the space. Use for cleaning supplies or pet grooming tools.
– Inside cabinet doors: Beyond vanity doors—think linen closet doors. Mount adhesive hooks for hairdryers. Use clear pockets for instruction manuals.
– Window sill utilization: If your bathroom has a window, place a shallow tray on the sill. Store a small plant or folded hand towels. Caution: Avoid placing items that could fall if window opens inward.
– Baseboard recesses: During renovations, a shallow niche (2″ deep) along the baseboard beside the toilet can hold a discreet toilet paper holder that blends with trim.
The “Nook Audit” ritual:
Once monthly, spend 5 minutes scanning your bathroom with fresh eyes. Ask:
– “Where do I consistently set things down temporarily?” (That spot needs a solution.)
– “What surface feels ‘crowded’ even when empty?” (Visual weight indicates poor flow.)
– “Where do I hesitate before opening a cabinet?” (Sign of disorganization.)
Designer insight: A narrow gap beside a pedestal sink was utilized with a custom-cut acrylic tray for hand soap refills and sponges. It’s invisible unless you’re looking for it—but solves a daily frustration.
Beyond the Zones: Adapting Solutions to Your Reality
Frameworks provide structure, but real life demands flexibility. Your bathroom’s size, household composition, budget, and constraints shape which solutions thrive. Let’s tailor the Zone Defense Framework to your unique context—without compromising the core principle of invisibility.
Small Bathroom Strategy: Illusion Through Intention
Under 40 square feet? Concealment enhances perceived space. Prioritize solutions that create openness:
– Mirror magic: Choose a medicine cabinet mirror over a standard mirror. The recessed storage adds zero visual bulk.
– Monochromatic continuity: Paint shelves the same color as walls. Items placed on them visually recede.
– Vertical emphasis: Install shelves high (near ceiling) to draw the eye upward, enhancing perceived height.
– Multi-functional furniture: Use a storage ottoman that doubles as seating and hidden storage.
– Consider spatial flow: In very compact bathrooms, floor-standing cabinets may reduce the sense of space; wall-mounted solutions often maintain a more open feel.
Case insight: A compact urban bathroom was transformed using only wall-mounted solutions: recessed niche in shower, floating shelf beside sink, tension rod for towels. Removing a floor cabinet created visual breathing room, making the space feel more expansive.
Family Bathroom Protocol: Chaos-Proof Concealment
With multiple users, concealment must withstand constant traffic. Focus on durability, clear labeling, and accessible zones:
– Color-code systems: Assign each family member a colored bin. Place bins in designated vanity drawers.
– “Launch pad” baskets: Install low hooks beside the door for each person’s daily essentials basket. Reduces morning congestion.
– Child-height solutions: Mount a low shelf (24″ from floor) with labeled bins for kids’ toothbrushes and washcloths. Empowers independence.
– Spill containment: Store liquid items in lidded bins under sinks. A tipped bottle won’t flood the cabinet.
– Weekly reset ritual: Spend 10 minutes resetting zones. Makes maintenance a shared habit.
Pro tip: Use picture labels for pre-readers. A photo of a toothbrush on a bin teaches ownership without words.
Renter’s Toolkit: Zero-Commitment Concealment
No drilling? Modern adhesive technology offers robust, removable solutions:
– Adhesive hooks: Choose brands with “damage-free removal” guarantees. Test on inconspicuous area first. Wait after application before loading.
– Tension rods: Use in showers, between walls, or over doors. Ensure rubber ends are clean for grip.
– Freestanding carts: Place slim metal carts beside vanities or in corners. Roll away for cleaning.
– Over-door organizers: Opt for fabric versions with reinforced tops—they distribute weight better.
– Removable wallpaper: Line the back of open shelves with peel-and-stick wallpaper. Adds personality; removes cleanly.
Critical reminder: Always review lease terms. When in doubt, get landlord approval in writing for any modification.
Accessibility-Conscious Design: Dignity Through Thoughtful Placement
Concealment should never compromise safety or independence. Integrate universal design principles:
– Reach ranges: Store daily essentials between 15–48″ from floor (common accessibility guideline). Avoid high shelves requiring stools.
– Contrast is key: Use light-colored containers against dark shelves (or vice versa) for visual distinction.
– Tactile labeling: Add textured stickers (rough for cleaners, smooth for toiletries) to containers.
– Pull-out priority: Slide-out trays under sinks reduce bending and reaching. Choose models with full-extension glides.
– Non-slip surfaces: Line shelves with rubberized matting. Prevents items from sliding.
Expert insight: “True accessibility means the solution feels intuitive, not clinical,” notes occupational therapy guidance. “A beautifully woven basket holding supplies near a grab bar maintains dignity while serving function.”
When Hiding Isn’t Enough: Solving Real-World Frictions
Even thoughtful systems encounter friction. Humidity challenges materials. Household habits vary. Budgets shift. This section addresses practical realities with actionable pivots that preserve your invisibility goals.
Humidity & Moisture: The Silent Storage Challenge
Bathrooms experience elevated humidity—enough to challenge certain materials over time. Material choice supports longevity.
Material considerations:
| Material | Humidity Consideration | Resilient Alternative |
|—————|—————————–|——————————–|
| Particleboard | Susceptible to swelling | Solid bamboo (properly sealed) |
| Uncoated steel| Prone to rust | Powder-coated steel |
| Cotton fabric | Can mildew | Synthetic blends |
| Standard wood | May warp | Marine-grade teak |
Proactive moisture management:
– Ventilation first: Run exhaust fan during and after showering. If no fan, crack a window.
– Silica gel strategy: Place silica packs inside cabinets, drawers, and under-sink zones. Replace or recharge monthly.
– Seal porous materials: Apply clear sealant to wooden organizers. Two coats minimum.
– Weekly wipe-down: Keep a microfiber cloth under the sink. Wipe shelves weekly to remove moisture film.
Real friction solved: “My wooden shelf above the toilet showed wear.” Pivot: Replace with a powder-coated metal shelf. Mount slightly higher to reduce steam exposure. Line with vinyl remnant for cushioning.
Budget Constraints: Strategic Investment Over Impulse Buys
You don’t need expensive organizers to achieve invisibility. Focus spending where it delivers maximum concealment ROI:
– High-impact, low-cost: Tension rods, adhesive hooks, dollar-store bins.
– Worth the splurge: Slide-out trays under sinks. They transform inaccessible space into daily utility.
– DIY goldmines:
– Wine crate vanity organizer: Sand, seal, and line with contact paper. Fits deep drawers.
– Mason jar magnetic holders: Glue strong magnets to jar lids. Mount steel strip beside mirror. Store cotton balls.
– Repurposed fabric: Fold old t-shirts into squares for reusable cleaning rags. Store in a bin.
The 80/20 spending approach: Allocate most of your budget to solutions used daily (vanity organizers, under-sink trays). Spend less on decorative elements.
Behavioral Friction: When Systems Meet Human Habits
The most elegant system succeeds only if it aligns with human behavior. Address these common friction points:
– Problem: “I put things back… eventually.”
Solution: Design “one-motion” returns. A hook beside the sink for the hairdryer takes seconds. A bin labeled “To Process” catches stray items without judgment.
– Problem: “My partner won’t follow the system.”
Solution: Co-create zones. Ask: “Where would you naturally look for this?” Compromise on placement. Label bins with names/photos.
– Problem: “I forget where I stored backups.”
Solution: Implement the “shadow board” technique. Trace item outlines on shelf liners. The shadow reminds you to restock.
Psychological insight: Systems thrive when they require minimal extra steps. Build concealment into existing habits: “After brushing teeth, drop the floss pick into the bin before turning off the light.”
Renovation Constraints: Working With What Exists
No gut renovation? Maximize existing architecture:
– Pedestal sink dilemma: Place a slim rolling cart beside the sink. Store daily items on top tier; backups below. Roll away when cleaning.
– No wall studs accessible: Use heavy-duty adhesive solutions rated for your item’s weight. Distribute weight across multiple anchors.
– Awkward angles: Custom-cut acrylic shelves to fit odd corners. Local glass shops often do this affordably.
– Low ceilings: Avoid tall cabinets. Use vertical space with wall-mounted hooks and narrow shelves. Draw the eye upward with vertical lines.
Designer perspective: “Work with the room’s personality, not against it. A quirky nook can become a charming feature with intentional concealment.”
Your Questions, Answered
Q: How do I hide cleaning supplies without making them hard to reach during quick cleanups?
A: Create a “cleaning command center” in the least visible yet accessible spot—typically beside the toilet or under the sink. Use a lidded bin labeled “Cleaning.” Inside, store spray bottles upright in a tray (prevents tipping), microfiber cloths folded neatly, and gloves in a mesh pocket. The lid hides visual clutter; the dedicated location ensures everything is grab-and-go. For daily wipe-downs, keep one all-purpose spray and cloth in a discreet pocket on the back of the bathroom door.
Q: Are recessed shower niches prone to leaking? How do I ensure mine is watertight?
A: Properly installed niches are reliable. Critical steps: 1) Frame between studs during construction (not after tile is set). 2) Line cavity with waterproof membrane extending beyond the niche opening. 3) Slope the niche shelf slightly forward so water drains out. 4) Use epoxy grout—it’s non-porous and mold-resistant. If adding post-construction, choose adhesive-mounted acrylic niches designed for wet areas; seal edges with 100% silicone caulk.
Q: What’s the safest way to store medications in a humid bathroom?
A: Health authorities generally recommend storing medications in a cool, dry place like a bedroom closet, as humidity can affect stability. If bathroom storage is unavoidable: 1) Use an airtight container. 2) Place silica gel packs inside. 3) Store in the coolest, driest zone—typically a high cabinet far from shower steam. 4) Check expiration dates regularly. For daily-use items like inhalers, keep only a minimal supply in the bathroom; store bulk refills elsewhere.
Q: How can I hide my electric razor and cords without creating a tripping hazard?
A: Implement a “cord management station” beside the mirror: 1) Mount a small pegboard section. 2) Install a hook for the razor. 3) Add a cord wrap clip beside it. 4) Place a small shelf above for the charging base. When not in use, wrap the cord, hang the razor, and place the base on the shelf. All items stay contained. For renters, use strong adhesive hooks rated for the razor’s weight.
Q: My kids keep leaving bath toys everywhere. What’s a solution that actually works?
A: Combine accessibility with clear cues: 1) Mount a large suction-cup caddy outside the tub spray zone. 2) Choose one with large, open compartments. 3) Add a picture label at child’s eye level. 4) Establish the rule: “Toys live in their home when not swimming.” Make cleanup part of bath-time ritual. Consistency matters more than the container.
Q: Are over-the-toilet shelves outdated? How can I use this space without it looking cluttered?
A: Over-the-toilet shelves aren’t outdated—they’re often overloaded. The clutter comes from overcrowding. Do this instead: 1) Choose one slim floating shelf (max 8″ deep). 2) Place only three items: a small plant, a decorative box holding TP, and one art print. 3) Keep the space beneath clear. This creates intentional negative space, which feels modern and calm. Avoid multi-tiered units—they visually chop the room.
Q: How do I conceal toilet paper rolls without buying special furniture?
A: Three accessible solutions: 1) Tuck rolls inside a woven seagrass basket placed beside the toilet base. The texture hides contents; open top allows easy access. 2) Slide rolls into a tall ceramic vase. They stand upright, hidden yet reachable. 3) For tight spaces, use an adhesive-mounted pocket organizer on the side of the vanity cabinet (facing the toilet). Holds 2–3 rolls discreetly. All options are affordable and require minimal installation.
Q: What’s the best way to store extra towels without a linen closet?
A: Integrate towel storage into existing zones: 1) Over-door: Hang a slim over-door rack on the back of the bathroom door. Stores folded hand towels. 2) Vertical: Install wall-mounted hooks high on the wall. Drape folded bath towels—they become textural decor. 3) Furniture: Use a storage bench at the foot of the tub. Lift-top access hides towels; provides seating. 4) Shower: Hang a tension rod outside the shower stall. Drape a bath towel over it to dry between uses.
Q: How often should I deep-clean my hidden storage zones?
A: Schedule zone-specific maintenance:
– Weekly: Wipe down vanity interiors, under-sink surfaces, and shower organizers.
– Monthly: Empty and sanitize bins/containers. Check for expired products. Refresh silica gel packs.
– Quarterly: Pull out slide-out trays; clean tracks. Inspect adhesive hooks.
– Annually: Empty entire vanity and under-sink zones. Assess unused items; donate or discard. Re-seal wooden organizers if needed.
Set phone reminders. Consistent micro-maintenance prevents overwhelming cleanouts.
Q: Can I use fabric baskets in the bathroom? Won’t they get moldy?
A: Yes—with precautions. Choose tightly woven, synthetic blends (polyester, nylon) over natural fibers. Look for “water-resistant” labels. Never place fabric baskets directly on wet surfaces or in high-splash zones. Ideal locations: inside vanity cabinets, on high shelves away from steam, or under sinks (lined with vinyl). If moisture exposure occurs, air-dry immediately. For high-humidity climates, opt for acrylic or seagrass alternatives.
Q: How do I adapt these solutions for a shared bathroom with very different routines?
A: Create personalized micro-zones within shared areas. Assign each person a designated drawer section, shelf tier, or basket color. Use vertical space: mount individual hooks at varying heights beside the mirror. Establish a shared “reset ritual” each evening—two minutes to return items to their zones. Communication is key: discuss what “concealed but accessible” means for each person’s routine.
Q: What’s the most overlooked storage spot in most bathrooms?
A: The interior of cabinet and closet doors. This vertical surface is frequently unused. Adhesive hooks, slim pockets, or magnetic strips can hold hair tools, cleaning supplies, or small accessories without consuming shelf space. It’s especially valuable in compact bathrooms where every inch counts.
Conclusion and Next Step
You now hold a complete blueprint for transforming bathroom clutter into calm—not through deprivation, but through intelligent concealment. We’ve moved beyond superficial tips to a spatially aware system where every necessity has a resolved home. The vanity’s internal architecture, the shower’s integrated niches, the toilet zone’s dignified solutions, the vertical real estate of walls and doors—all work in concert to eliminate visual noise while preserving effortless function. This isn’t about hiding your life; it’s about honoring your need for serenity in a space dedicated to care.
Recap: The 3 Non-Negotiables of Invisible Storage
1. Context over containment: Place items where their location serves your routine, not just where space exists.
2. Material intelligence: Match storage solutions to environmental demands (humidity, moisture, traffic).
3. Behavioral alignment: Design systems that require minimal effort to maintain—because sustainability beats perfection.
The 24-Hour Rule
Tonight, before bed, spend exactly 24 minutes on one micro-action: Empty the top drawer of your vanity. Install one divider. Place daily-use items in the front section. Close the drawer. That single act creates immediate visual calm and builds momentum. Tomorrow, you’ll notice the difference. Progress compounds.
The Big Picture
Your bathroom is more than a functional room—it’s a daily touchpoint for self-care. When clutter vanishes, intentionality emerges. You’ll find mornings smoother, evenings more restorative, and the space itself feeling expansive regardless of square footage. This framework extends beyond bathrooms: apply Zone Defense thinking to kitchen counters, entryway chaos, or closet overwhelm. You’ve learned to see space not as empty volume to fill, but as a canvas for calm.
Start small. Celebrate the cleared drawer. The hidden shampoo bottle. The serene sightline where chaos once lived. This is the quiet revolution of intentional living—one concealed necessity at a time.
Explore Our Complete System:
Mastering Small Spaces: 17 Zones Most Homes Waste | The 10-Minute Daily Reset: Habit Stacking for Home Calm | Renters’ Rights: Damage-Free Upgrades That Landlords Approve | The Clutter Cure: A Room-by-Room Decluttering Protocol | Sustainable Storage: Eco-Friendly Organizers That Last Decades | Lighting as Layout: Using Illumination to Define Functional Zones | The Maintenance Mindset: Preventing Chaos Before It Starts